Ventilation and Electrical Requirements for DIY Kitchen Cabinet Installation
When embarking on a DIY kitchen cabinet installation project, it’s crucial to have a clear understanding of the ventilation and electrical requirements to ensure a safe and functional kitchen space. In this comprehensive guide, we’ll address ten of the most commonly asked questions related to ventilation and electrical considerations for DIY kitchen cabinet installation.
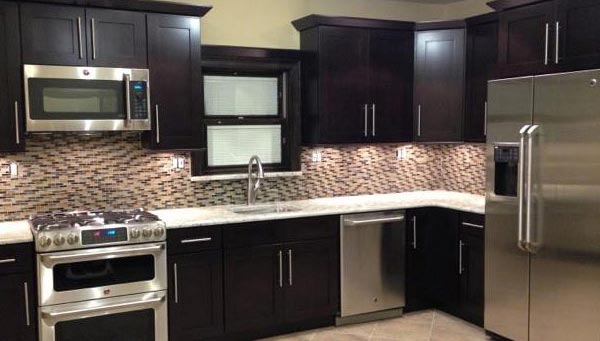
See: Kitchen Cabinets
1. What are the Basic Ventilation Requirements for a Kitchen Cabinet Installation?
Proper ventilation is essential in a kitchen to remove odors, moisture, and airborne grease particles. To ensure adequate ventilation during your DIY kitchen cabinet installation, consider the following:
- Exhaust Fan: Install an exhaust fan or range hood above your stove or cooktop to expel cooking fumes outside.
- Ventilation Ducts: Connect the exhaust fan or range hood to a ventilation duct that leads outdoors. Use the appropriate size and material for the duct to ensure efficiency.
- Natural Ventilation: Windows and doors can also contribute to natural ventilation. Ensure there’s sufficient airflow through these openings.
- Cabinet Design: Plan your cabinet layout to allow for proper ventilation around appliances like the stove and oven.
- Maintenance: Regularly clean and maintain your exhaust system to ensure it functions optimally.
- Permits: Check local building codes and regulations for specific ventilation requirements in your area.
Remember that proper ventilation not only improves air quality but also prevents the buildup of harmful substances in your kitchen.
2. How Do I Determine the Electrical Requirements for My Kitchen Cabinet Installation?
Understanding your electrical requirements is crucial for a safe and functional kitchen. Follow these steps to determine your electrical needs:
- Load Calculation: Calculate the electrical load for your kitchen by adding up the wattage of all appliances, lighting, and outlets. This will help you size your electrical service adequately.
- Circuit Planning: Plan your circuits strategically to distribute the load evenly. Consider separate circuits for appliances, lighting, and outlets.
- GFCI Outlets: Install Ground Fault Circuit Interrupter (GFCI) outlets near water sources, such as sinks and countertops, to enhance safety.
- Adequate Outlets: Ensure there are enough outlets to meet your needs. Follow local electrical codes for spacing and placement.
- Dedicated Circuits: Appliances like ovens and dishwashers may require dedicated circuits. Consult an electrician for guidance.
- Lighting Design: Plan your kitchen’s lighting layout to provide adequate task lighting and ambiance.
- Dimmer Switches: Consider installing dimmer switches for adjustable lighting levels.
- Under-Cabinet Lighting: Explore under-cabinet lighting options for both functionality and aesthetics.
- Electrical Panel Upgrade: If your existing electrical service is insufficient, you may need to upgrade your electrical panel. Consult an electrician for this task.
- Permits: Always obtain the necessary electrical permits and inspections to ensure compliance with local codes.
By carefully assessing your kitchen’s electrical needs and following safety guidelines, you can enjoy a well-lit and functional space for your DIY cabinet installation project.
3. Can I Relocate Electrical Outlets During a Kitchen Cabinet Installation?
Yes, you can relocate electrical outlets during a kitchen cabinet installation, but it’s essential to follow safety procedures and electrical codes. Here are the steps to relocate outlets:
- Turn Off Power: Ensure the power to the circuit is turned off at the main electrical panel.
- Assess Wiring: Carefully assess the existing wiring to determine its condition and suitability for relocation.
- Plan New Locations: Plan the new outlet locations according to your cabinet layout and electrical needs.
- Install Boxes: Install electrical boxes at the new locations, ensuring they are flush with the wall surface.
- Run Wiring: Carefully run new electrical wiring from the original outlet to the new boxes. Use appropriate cable and follow local codes for wiring methods.
- Connect Outlets: Wire the outlets at the new locations, following standard wiring practices, such as connecting black (hot), white (neutral), and green or bare (ground) wires.
- Test Outlets: Before closing up the walls, test the new outlets to ensure they are functioning correctly.
- Patch and Paint: Patch any holes or wall damage caused by the relocation, and paint to match the existing wall finish.
- Obtain Inspections: If required by local codes, schedule electrical inspections to ensure compliance and safety.
- Label and Document: Clearly label the electrical panel to indicate the new outlet locations for future reference.
Relocating electrical outlets is a task that may require electrical expertise, so consider consulting a licensed electrician if you are unsure about any aspect of the process.
4. How Do I Ensure Proper Ventilation for Cabinet Installation Around Appliances?
Proper ventilation is crucial when installing cabinets around appliances to prevent overheating and maintain appliance functionality. Here are steps to ensure adequate ventilation:
- Measure Clearances: Check the manufacturer’s guidelines for required clearances around appliances, including refrigerators, ovens, and dishwashers.
- Ventilation Gaps: Leave sufficient gaps between the cabinets and appliances to allow for airflow. Follow manufacturer recommendations.
- Exhaust Hood Installation: If installing cabinets above a stove or cooktop, incorporate an exhaust hood or range hood to remove cooking odors and smoke. Ensure it’s properly vented to the exterior.
- Heat Shields: Consider installing heat shields or panels on cabinet sides adjacent to appliances like ovens and dishwashers to protect the cabinet finish.
- Cabinet Materials: Choose cabinet materials that can withstand the heat and moisture generated by appliances. Plywood and MDF with heat-resistant finishes are suitable options.
- Appliance Ventilation: Some appliances, like refrigerators, may have built-in ventilation systems. Ensure these remain unobstructed by cabinets.
- Ventilation Fans: In cases where appliances generate significant heat, such as built-in microwaves or wall ovens, consider installing ventilation fans in the cabinet space to help dissipate heat.
- Maintenance: Regularly clean and inspect the cabinet spaces around appliances to ensure adequate airflow and prevent dust buildup.
Proper ventilation not only extends the lifespan of your appliances but also ensures a safe and functional kitchen environment.
5. Can I Install Under-Cabinet Lighting Without Rewiring?
Installing under-cabinet lighting can enhance both the functionality and aesthetics of your kitchen. You can often do this without extensive rewiring by following these steps:
- LED Strip Lights: Consider using LED strip lights, which are energy-efficient and easy to install. They can be plugged into existing outlets or installed with battery packs.
- Plug-in Options: Many under-cabinet lighting systems are available as plug-in units that can be connected to existing outlets.
- Wireless Solutions: Explore wireless under-cabinet lighting options that operate on batteries or are rechargeable.
- Surface-Mount Fixtures: Surface-mount fixtures can be attached directly to the underside of cabinets without the need for extensive wiring.
- Dimmer Switches: To control the intensity of the lighting, consider installing dimmer switches, which can often replace existing switches.
- Adhesive or Bracket Installation: Depending on the type of lighting, you can attach it using adhesive strips or brackets, avoiding the need for drilling or rewiring.
- Consult an Electrician: If you wish to hardwire the lighting or need extensive electrical work, consult an electrician to ensure safety and code compliance.
Under-cabinet lighting can be a DIY-friendly project, but always prioritize safety and follow manufacturer instructions for installation.
6. Should I Consider Task Lighting in My Kitchen Cabinet Installation?
Task lighting is a crucial aspect of kitchen cabinet installation as it provides focused illumination for various kitchen activities. Here’s how to consider task lighting:
- Identify Work Zones: Determine the primary work zones in your kitchen, such as the cooking area, sink, and food preparation areas.
- Under-Cabinet Lighting: Install under-cabinet lighting in these work zones to provide direct, shadow-free illumination for tasks like chopping, cooking, and dishwashing.
- LED Strips or Puck Lights: Consider using LED strips or puck lights for under-cabinet lighting, as they are energy-efficient and produce minimal heat.
- Lighting Controls: Implement separate controls for task lighting to adjust brightness as needed. Dimmer switches are ideal for this purpose.
- Color Temperature: Choose LED lighting with a color temperature that suits your preferences and enhances visibility in the kitchen.
- Professional Installation: For complex lighting designs or hardwiring, consult a professional electrician to ensure safety and compliance with electrical codes.
Task lighting not only improves functionality but also adds a touch of elegance to your kitchen.
7. What are the Safety Precautions for DIY Electrical Work During Cabinet Installation?
Safety should be a top priority when undertaking DIY electrical work during cabinet installation. Follow these safety precautions:
- Turn Off Power: Always turn off the power at the electrical panel before working on any electrical components.
- Test for Live Wires: Use a voltage tester to confirm that wires are not live before handling them.
- Wear Safety Gear: Use appropriate safety gear, including gloves and safety glasses, when working with electrical components.
- Proper Tools: Use the correct tools for the job, and ensure they are in good condition.
- Follow Codes: Adhere to local electrical codes and regulations when performing electrical work. Obtain necessary permits if required.
- GFCI Outlets: Install GFCI outlets near water sources to protect against electric shock.
- Avoid Overloading Circuits: Distribute the electrical load evenly among circuits to prevent overloading.
- Seek Professional Help: If you are unsure about any aspect of electrical work, consult a licensed electrician to ensure safety and compliance.
8. How Do I Ensure Adequate Ventilation for Cabinet Installation in a Compact Kitchen?
In a compact kitchen, optimizing ventilation can be challenging, but it’s essential for a comfortable cooking environment. Here’s how to ensure adequate ventilation:
- Compact Exhaust Hood: Install a compact, space-saving exhaust hood above your stove or cooktop. Look for models designed for smaller kitchens.
- Ventilation Fan Placement: Position the exhaust fan or range hood to maximize its effectiveness in capturing cooking fumes.
- Ventilation Ducts: Use flexible or compact ventilation ducts that can be routed through tight spaces to reach an exterior wall or roof vent.
- Recirculating Hoods: If ductwork installation is impractical, consider a recirculating hood with built-in filters to remove odors and particles.
- Open Shelving: Incorporate open shelving in your cabinet design to allow for better air circulation and a more open feel in a compact kitchen.
- Minimize Clutter: Keep countertops and surfaces clear to prevent obstruction of airflow.
- Regular Cleaning: Maintain a clean kitchen to prevent the buildup of grease and debris that can hinder ventilation.
- Consider Ventilation Alternatives: If traditional exhaust systems are not feasible, explore alternative ventilation options like ceiling-mounted fans or window fans.
Effective ventilation is crucial, even in compact kitchens, to maintain air quality and a comfortable cooking space.
9. Can I Install a Ceiling Fan in My Kitchen for Ventilation?
Installing a ceiling fan in your kitchen can provide additional ventilation and improve air circulation. Here’s how to go about it:
- Location: Choose an appropriate location for the ceiling fan that complements your kitchen’s layout and provides effective airflow.
- Size: Select a fan size that matches the room’s dimensions. Larger rooms may require larger fans for optimal airflow.
- Height: Ensure the fan is installed at the correct height, typically 7-9 feet above the floor, and 8-10 inches below the ceiling.
- Support Structure: Verify that the ceiling can support the weight of the fan. Use a fan-rated electrical box and secure it to a ceiling joist.
- Wiring: Follow the manufacturer’s instructions for wiring the fan to the electrical supply. Use the appropriate switches and controls.
- Ductless Options: Some ceiling fans come with built-in filters and recirculating options, making them suitable for kitchens without ductwork.
- Safety: Always prioritize safety when installing electrical fixtures. Turn off the power before beginning the installation.
- Professional Help: If you’re unsure about the installation process, consult an electrician or contractor for assistance.
Installing a ceiling fan can enhance both ventilation and comfort in your kitchen.
10. What are the Best Practices for Cabinet Lighting Installation to Avoid Electrical Hazards?
Proper installation of cabinet lighting is essential to prevent electrical hazards. Follow these best practices:
- Choose Certified Fixtures: Select lighting fixtures that are certified by recognized safety organizations, such as UL (Underwriters Laboratories).
- Waterproof Fixtures: In areas prone to moisture, like under-cabinet lighting near sinks, use waterproof or damp-rated fixtures.
- Correct Wiring: Ensure all wiring is properly insulated and secured to prevent exposure or damage.
- GFCI Protection: Install under-cabinet lighting on GFCI-protected circuits to enhance safety near water sources.
- Professional Installation: If you’re uncomfortable with electrical work or have complex lighting needs, hire a licensed electrician for installation.
- Regular Maintenance: Periodically inspect and maintain your cabinet lighting to address any issues promptly.
By following these best practices, you can enjoy the benefits of cabinet lighting while minimizing electrical risks in your kitchen.
In conclusion, understanding the ventilation and electrical requirements for DIY kitchen cabinet installation is essential to create a safe and functional kitchen space. By addressing these common questions and following best practices, you can ensure a successful and enjoyable DIY project. Always prioritize safety and compliance with local codes throughout the installation process.
Conclusion
In this comprehensive guide, we have explored the crucial aspects of ventilation and electrical requirements for DIY kitchen cabinet installation. We addressed ten of the most commonly asked questions, providing valuable insights and practical tips to help you navigate these essential considerations.
Proper ventilation is essential to maintain air quality, remove odors, and prevent the buildup of harmful substances in your kitchen. Whether it’s installing exhaust fans, planning for natural ventilation, or adhering to local building codes, ensuring adequate airflow is key to a safe and comfortable kitchen environment.
Understanding your electrical requirements is equally important for a functional kitchen. By calculating your electrical load, strategically planning circuits, and following safety guidelines, you can create a well-lit and efficient workspace while complying with electrical codes.
We discussed relocating electrical outlets, ventilation around appliances, under-cabinet lighting, task lighting, safety precautions for DIY electrical work, and optimizing ventilation in compact kitchens. Additionally, we explored the installation of ceiling fans for improved airflow and cabinet lighting best practices to avoid electrical hazards.
Throughout this guide, the overarching message has been clear: safety, compliance with local regulations, and proper planning are fundamental when embarking on a DIY kitchen cabinet installation project. By following the guidelines provided and seeking professional assistance when needed, you can achieve a successful and enjoyable DIY experience while creating the kitchen of your dreams.
Remember that every kitchen is unique, and the specific requirements may vary based on your layout, appliances, and personal preferences. Therefore, it’s essential to adapt the information here to suit your specific needs and consult with experts when necessary.
With the knowledge and insights gained from this guide, you are well-equipped to tackle your DIY kitchen cabinet installation project, ensuring both functionality and safety in your culinary haven.
Read: Replacing Unusable Cabinets with DIY Kitchen Cabinet Installation
Read: Insulation Requirements for DIY Kitchen Cabinet Installation
