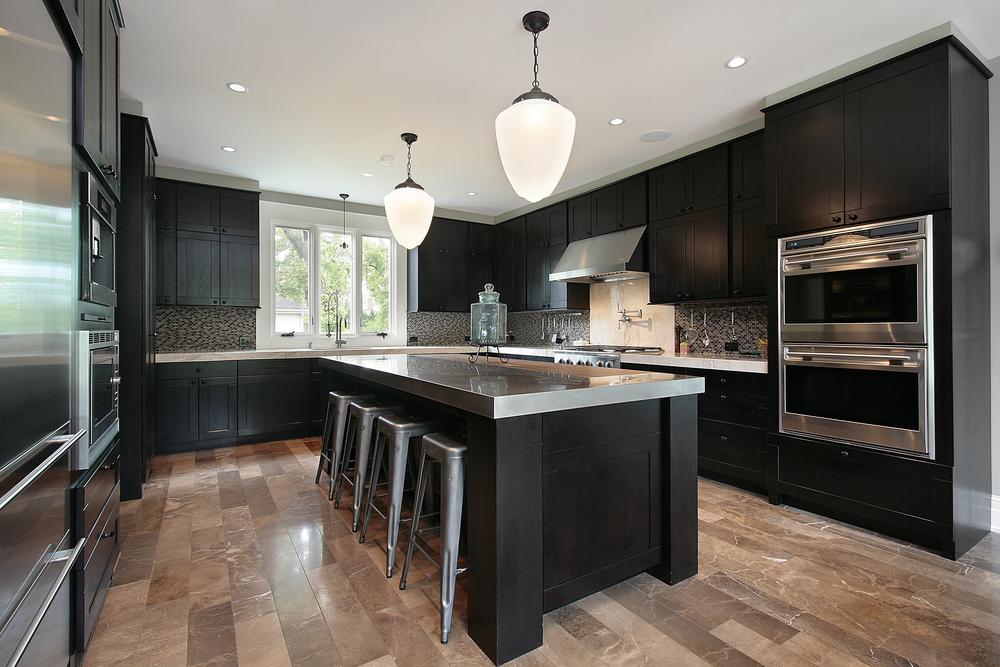
Replacing Unusable Cabinets with DIY Kitchen Cabinet Installation
In this comprehensive guide, we will address the top 10 most frequently asked questions about replacing unusable cabinets with DIY kitchen cabinet installation. If you’re looking to breathe new life into your kitchen by replacing old or damaged cabinets, this article will provide you with valuable insights and step-by-step instructions to help you tackle this DIY project successfully.
1. Can I Replace Kitchen Cabinets on My Own?
Replacing kitchen cabinets is a project that can be accomplished by DIY enthusiasts with the right tools and a good understanding of carpentry. However, it’s essential to assess your skills and comfort level with woodworking before embarking on this task. If you have experience with basic carpentry and are confident in your abilities, you can certainly tackle this project on your own. Otherwise, consider seeking assistance from a professional to ensure a smooth and safe installation.
Planning and Preparation
Before you begin, it’s crucial to plan your project meticulously. Here’s a step-by-step guide to help you get started:
- Assess Your Current Cabinets: Examine your existing cabinets to determine the scope of the project. Note any damage or issues that need to be addressed.
- Set a Budget: Determine how much you’re willing to spend on materials and tools. This will help you make informed decisions during the planning process.
- Measure and Plan: Take accurate measurements of your kitchen and create a layout plan. Consider the layout, size, and style of the new cabinets.
- Gather Tools and Materials: Purchase all the necessary tools and materials, such as cabinets, screws, drill, level, measuring tape, and safety equipment.
- Prepare the Workspace: Clear out your kitchen and create a workspace. Protect floors and countertops from damage during the installation.
Cabinet Removal
Once you’ve completed the planning and preparation phase, it’s time to move on to the actual cabinet replacement. Here’s how you can remove your old cabinets:
- Turn off Utilities: Disconnect gas, water, and electricity connections to appliances or fixtures connected to the cabinets.
- Remove Cabinet Doors and Hardware: Take off cabinet doors, drawers, and hardware like handles and knobs.
- Detach Cabinets: Carefully unscrew and detach the cabinets from the wall, starting from the top and working your way down.
- Patch and Paint: Repair any damage to the walls and paint if necessary before installing the new cabinets.
Cabinet Installation
With the old cabinets removed, it’s time to install the new ones:
- Start with Upper Cabinets: Begin by installing the upper cabinets. Use a level to ensure they are straight and secure them to the wall using screws.
- Install Base Cabinets: Next, install the base cabinets, making sure they are level and properly aligned with the upper cabinets.
- Add Countertops: Once the cabinets are securely in place, you can install the countertops, backsplash, and other finishing touches.
- Reconnect Utilities: Finally, reconnect gas, water, and electricity connections if needed and reinstall cabinet doors and hardware.
Finishing Touches
To complete your kitchen cabinet replacement project, don’t forget these finishing touches:
- Clean and Organize: Give your new cabinets a thorough cleaning and organize your kitchen items efficiently.
- Decorate and Personalize: Add decorative elements and personalize your kitchen to make it truly yours.
Remember, patience and attention to detail are essential when replacing kitchen cabinets on your own. If you’re uncertain about any aspect of the project, consider consulting with a professional or seeking guidance from experienced DIYers.
2. What Types of Kitchen Cabinets Are Suitable for DIY Installation?
When embarking on a DIY kitchen cabinet installation project, it’s essential to choose cabinets that are suitable for self-installation. Here’s a breakdown of cabinet types that are ideal for DIYers:
Pre-Assembled Cabinets
Pre-assembled cabinets, also known as ready-to-assemble (RTA) cabinets, are a popular choice for DIY installations. These cabinets arrive at your doorstep already assembled, making the installation process more straightforward. RTA cabinets come in a wide range of styles and finishes, offering plenty of design options for your kitchen.
Advantages of Pre-Assembled Cabinets:
- Ease of Installation: Since they are pre-assembled, you won’t need advanced carpentry skills to put them in place.
- Cost-Effective: RTA cabinets are often more budget-friendly compared to custom or semi-custom options.
- Quick Delivery: These cabinets are readily available and can be delivered faster than custom-built ones.
Semi-Custom Cabinets
Semi-custom cabinets provide a middle ground between fully custom and stock cabinets. While they offer some customization options, they are not as complex to install as entirely custom cabinets. You can typically choose from a variety of styles, finishes, and sizes to fit your kitchen’s layout.
Advantages of Semi-Custom Cabinets:
- Tailored to Your Space: You can adjust the dimensions to better suit your kitchen layout.
- Quality Materials: Semi-custom cabinets often use high-quality materials and construction.
- Design Flexibility: You can select features like cabinet depth, drawer configurations, and accessories.
Stock Cabinets
Stock cabinets are pre-made cabinets that come in standard sizes and designs. They are readily available at home improvement stores and are suitable for basic kitchen remodels. While they may not offer as much customization as semi-custom or custom cabinets, they are among the most straightforward options for DIY installation.
Advantages of Stock Cabinets:
- Affordability: Stock cabinets are typically the most budget-friendly option.
- Readily Available: You can purchase them off the shelf at many home improvement retailers.
- Simplicity: The installation process for stock cabinets is relatively simple, making them beginner-friendly.
Custom Cabinets
Custom cabinets are built to your exact specifications and design preferences. While they offer the ultimate in personalization, they are typically not recommended for DIY installation unless you have advanced woodworking skills and experience.
Advantages of Custom Cabinets:
- Tailored Design: You can create cabinets that perfectly match your kitchen’s layout and style.
- High-Quality Craftsmanship: Custom cabinets are often crafted with precision and premium materials.
- Unique Features: You can include specialized features and accessories.
When choosing the type of cabinets for your DIY kitchen cabinet installation, consider your skill level, budget, and the complexity of your project. Pre-assembled, semi-custom, and stock cabinets are generally more suitable for DIYers, while custom cabinets are best left to professionals or experienced woodworkers.
3. How Do I Measure and Plan for New Kitchen Cabinets?
Proper measurement and planning are the foundation of a successful DIY kitchen cabinet installation. Accurate measurements and careful planning ensure that your new cabinets fit seamlessly into your kitchen space. Here’s a step-by-step guide to help you measure and plan effectively:
Step 1: Assess Your Current Cabinets
Start by examining your existing cabinets to understand their layout and any issues that need to be addressed. Note the following:
- Cabinet Dimensions: Measure the width, height, and depth of your existing cabinets.
- Spacing: Check the distance between cabinets, appliances, walls, and other fixtures in your kitchen.
- Obstacles: Identify any obstacles such as plumbing or electrical outlets that may affect cabinet placement.
Step 2: Create a Layout Plan
Before purchasing new cabinets, create a detailed layout plan. Consider the following factors:
- Work Triangle: Ensure that the sink, stove, and refrigerator form a functional work triangle with easy access.
- Cabinet Types: Decide on the types of cabinets you need, including base cabinets, wall cabinets, and specialty cabinets.
- Appliance Placement: Plan where your appliances, such as the oven and dishwasher, will be located in relation to the cabinets.
- Storage Needs: Assess your storage needs and plan for features like drawers, shelves, and pull-out trays.
Step 3: Take Precise Measurements
Accurate measurements are crucial to ensure that your new cabinets fit perfectly. Use a measuring tape and follow these guidelines:
- Measure the height and width of the space where each cabinet will be installed.
- Measure from the floor to the ceiling and note any variations in ceiling height.
- Account for the thickness of flooring materials, such as tiles or hardwood, when measuring for base cabinets.
- Check that walls are level and plumb, as uneven walls can affect cabinet installation.
Step 4: Account for Clearances
Allow for clearances when planning the placement of your cabinets:
- Leave at least 15 inches of counter space on either side of the stove for safety and workspace.
- Ensure that there is at least 18 inches of clearance above the dishwasher for easy loading and unloading.
- Maintain a 24-inch clearance next to the refrigerator for unhindered access.
- Leave space between the sink and any adjacent cabinet or wall for faucet installation.
Step 5: Select Your Cabinets
Based on your layout plan and measurements, choose the types and sizes of cabinets that best suit your kitchen. Consider factors such as style, material, and finishes to match your kitchen’s aesthetic.
Step 6: Consult with Professionals
If you have any doubts or uncertainties during the planning and measurement process, don’t hesitate to consult with professionals, such as kitchen designers or cabinet manufacturers. They can provide valuable insights and ensure that your plans are accurate.
By following these steps and paying attention to detail, you’ll be well-prepared for your DIY kitchen cabinet installation. Accurate measurements and thorough planning will save you time and help you avoid costly mistakes. In the upcoming sections, we’ll delve into the practical aspects of cabinet removal and installation, guiding you through the process step by step.
4. What Tools and Materials Do I Need for DIY Kitchen Cabinet Installation?
To successfully replace unusable cabinets with new ones in your kitchen, you’ll need the right tools and materials. Having the proper equipment on hand is crucial for a smooth DIY cabinet installation project. Here’s a comprehensive list of tools and materials you’ll need:
Tools:
- Screwdriver Set: A set of screwdrivers, including Phillips and flathead, for various tasks.
- Drill: A power drill with screwdriver bits for faster and more efficient installation.
- Measuring Tape: To ensure accurate measurements and placement.
- Level: A spirit level to ensure your cabinets are installed straight and level.
- Pencil: For marking measurements and placement on walls and cabinets.
- Stud Finder: To locate and mark the wall studs for secure cabinet attachment.
- Carpenter’s Square: For making precise cuts and ensuring right angles.
- Safety Equipment: Safety glasses, ear protection, and dust masks for your protection.
- Clamps: To hold cabinets in place during installation.
- Hammer: For minor adjustments and securing cabinets.
- Jigsaw or Circular Saw: For cutting openings for plumbing or electrical fixtures.
- Table Saw: If you need to trim or customize cabinet pieces.
- Caulk Gun: For sealing gaps between cabinets and walls or seams.
- Utility Knife: For trimming excess material or cutting caulk.
- Spackle or Wood Filler: For patching holes or imperfections in walls.
Materials:
- Cabinets: The new cabinets you’ve selected for your kitchen.
- Screws: Appropriate screws for securing cabinets to the wall and to each other.
- Shims: Thin wooden shims for leveling cabinets.
- Cabinet Hardware: Handles, knobs, or pulls for your cabinet doors and drawers.
- Countertops: New countertops to fit your cabinet layout.
- Backsplash: If you’re adding a backsplash, you’ll need the chosen material (e.g., tiles, glass, or laminate).
- Cabinet Plywood or Panels: For any custom pieces or modifications.
- Primer and Paint: If you plan to paint or finish the cabinets yourself.
- Cabinet Mounting Brackets: To secure upper cabinets to the wall.
- Construction Adhesive: For added cabinet stability and strength.
- Wood Glue: If you need to bond wood pieces together.
- Cabinet Organizers: Optional accessories for optimizing storage space.
- Caulk and Caulk Sealant: For sealing gaps and seams for a finished look.
Before starting your DIY kitchen cabinet installation, ensure that all your tools and materials are readily available and in good condition. Proper preparation with the right equipment will save you time and frustration during the project.
5. How Do I Remove Old Kitchen Cabinets?
Removing old kitchen cabinets is a crucial step in the DIY cabinet installation process. Here’s a detailed guide on how to safely and efficiently remove your old cabinets:
Step 1: Prepare Your Workspace
- Clear the Area: Remove all items from your cabinets and clear the countertop. You’ll need a clutter-free workspace.
- Turn Off Utilities: Shut off the gas, water, and electricity connections to any appliances or fixtures connected to the cabinets.
Step 2: Remove Cabinet Doors and Hardware
- Label Doors and Hardware: Use masking tape and a marker to label each cabinet door and its corresponding hardware. This will make reassembly easier.
- Remove Doors and Hardware: Using a screwdriver or drill, unscrew and remove the cabinet doors, drawers, and hardware such as handles and knobs. Place these items in a safe, organized manner.
Step 3: Detach Cabinets from the Wall
- Start at the Top: Begin with the upper cabinets. Using a drill or screwdriver, remove the screws securing the cabinets to the wall. Have a helper support the cabinet as you remove the final screws.
- Work Downward: Move to the base cabinets and repeat the process. Be cautious when removing the last screws, as the cabinet may become unstable.
- Remove Filler Pieces: If there are filler pieces between cabinets, take those out carefully as well.
Step 4: Patch and Paint
- Repair Walls: Inspect the wall behind the cabinets for any damage or holes. Patch and repair these areas with spackle or wood filler.
- Paint or Touch Up: If necessary, touch up the wall with paint to match the rest of the kitchen.
Step 5: Dispose of Old Cabinets
- Recycle or Dispose: Depending on the material, you can recycle old cabinets or arrange for proper disposal through local waste disposal services.
- Reuse: Consider repurposing old cabinets in other areas of your home or donating them if they are in good condition.
Step 6: Inspect and Prepare the Wall
- Check Wall Condition: Ensure that the wall is clean, level, and free of any obstructions or protruding nails.
- Locate Wall Studs: Use a stud finder to locate the wall studs. Mark their positions as these will be used to secure the new cabinets.
Now that you’ve successfully removed the old cabinets, you’re ready to proceed with the installation of your new kitchen cabinets. The preparation and removal phase is essential for creating a clean slate for your DIY cabinet installation.
In the upcoming sections, we’ll guide you through the installation process, helping you transform your kitchen with your new cabinets.
Read: Upgrading Existing Cabinets with DIY Kitchen Cabinet Installation
Read: Ventilation and Electrical Requirements for DIY Kitchen Cabinet Installation
