How to Get a Professional Look While Painting Kitchen Cabinets
Introduction
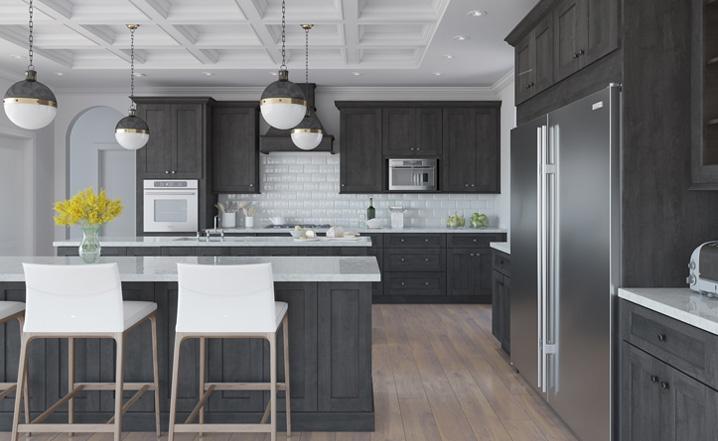
Painting kitchen cabinets is a cost-effective way to transform the look of your kitchen. However, achieving a professional finish can be challenging. In this series of articles, we will answer the top 10 most asked questions about how to get a professional look while painting kitchen cabinets. Each question will be addressed in a separate article, providing you with detailed guidance and tips to help you achieve that polished and stylish result.
Article 1: Choosing the Right Paint for Kitchen Cabinets
When it comes to painting kitchen cabinets, selecting the right paint is crucial. Here’s what you need to consider:
1.1: Oil-Based vs. Water-Based Paint
- Oil-based paints offer a durable finish but may take longer to dry.
- Water-based paints dry faster and have lower VOC emissions, making them environmentally friendly.
1.2: Cabinet Material
- The type of material your cabinets are made from can impact your paint choice. For example, MDF cabinets require different paint than wood cabinets.
1.3: Sheen Level
- High-gloss paint provides a sleek, modern look, while satin or semi-gloss finishes are more forgiving of imperfections.
1.4: Color Selection
- Lighter colors can make your kitchen feel more open and spacious, while darker colors add depth and drama.
1.5: Primer
- Using a high-quality primer is essential to ensure the paint adheres well and provides a smooth finish.
1.6: Paint Quality
- Invest in top-quality paint to achieve a professional look. Cheaper paints may result in a less durable finish.
1.7: Test Swatches
- Always test paint swatches on a small area of your cabinets to ensure you like the color and finish before committing.
1.8: Consult a Professional
- If you’re unsure about which paint to choose, consider consulting a professional painter for recommendations.
1.9: Proper Preparation
- Properly prepare your cabinets by cleaning, sanding, and filling any imperfections before painting.
1.10: Paint Application
- Apply the paint evenly using a brush or roller, following the wood grain. Multiple thin coats are better than one thick coat.
By carefully selecting the right paint for your kitchen cabinets, you’re setting the foundation for a professional-looking finish that will stand the test of time.
In the next article, we’ll tackle another common question: “How do I prepare my cabinets for painting?” Stay tuned for more expert tips and guidance on achieving that professional look for your kitchen cabinets.
Article 2: Preparing Your Cabinets for Painting
Before you start painting your kitchen cabinets, it’s essential to prepare them properly to ensure a professional finish. Here’s how to do it:
2.1: Remove Cabinet Hardware
- Take off all cabinet knobs, handles, and hinges to make painting easier and achieve a cleaner look.
2.2: Empty Cabinets
- Remove all items from your cabinets to prevent them from getting in the way and to protect them from paint splatters.
2.3: Clean Thoroughly
- Use a degreaser to clean the cabinets thoroughly. Grease and grime can affect paint adhesion.
2.4: Sanding
- Lightly sand the cabinet surfaces to create a rough texture for better paint adhesion. Use a fine-grit sandpaper (around 120-150 grit).
2.5: Fill Imperfections
- Fill any holes, dents, or cracks with wood filler and sand them smooth once dry.
2.6: Dust Removal
- After sanding, clean off all dust with a tack cloth or a damp cloth. Any remaining dust can ruin the finish.
2.7: Primer Application
- Apply a high-quality primer evenly to the cabinet surfaces. Primer helps the paint adhere and provides a smoother finish.
2.8: Sand Again
- After the primer dries, lightly sand the cabinets once more to ensure a silky-smooth surface.
2.9: Clean Again
- Clean the cabinets again to remove any dust or debris from sanding.
2.10: Masking and Taping
- Use painter’s tape to mask off areas you don’t want to paint, such as walls or countertops.
Properly preparing your cabinets is a crucial step in achieving a professional look. It ensures that the paint adheres correctly and that your cabinets have a smooth, flawless finish.
Article 3: Essential Tools and Equipment for Painting Kitchen Cabinets
To achieve a professional finish when painting your kitchen cabinets, it’s vital to have the right tools and equipment on hand. Here’s a list of what you’ll need:
3.1: Paintbrushes and Rollers
- Invest in high-quality paintbrushes and foam rollers for a smooth, even application of paint.
3.2: Painter’s Tape
- Use painter’s tape to protect adjacent surfaces, such as walls and countertops, from accidental paint splatters.
3.3: Drop Cloths
- Cover your kitchen floor and countertops with drop cloths to catch any drips or spills.
3.4: Sandpaper
- Have a range of sandpaper grits (120-220) available for sanding cabinets before painting and between coats.
3.5: Wood Filler
- You’ll need wood filler to patch any holes or imperfections in your cabinets.
3.6: Degreaser
- Use a degreaser to thoroughly clean cabinet surfaces before painting to ensure proper adhesion.
3.7: Primer
- Choose a high-quality primer specifically designed for use on kitchen cabinets.
3.8: Paint
- Select the paint of your choice, whether it’s oil-based or water-based, in the color and finish you desire.
3.9: Paint Tray and Liners
- A paint tray and disposable liners make clean-up easier and keep your paint fresh.
3.10: Sanding Block
- A sanding block with a comfortable grip is helpful for sanding cabinet surfaces evenly.
Having these tools and equipment readily available will streamline the cabinet painting process and contribute to achieving a professional look. Remember to clean your tools thoroughly after each use to prolong their lifespan and maintain their effectiveness.
In the next article, we’ll answer the question: “What are the best techniques for applying paint to kitchen cabinets?” Stay tuned for expert advice on the painting process itself.
Article 4: Techniques for Applying Paint to Kitchen Cabinets
Once you have prepared your kitchen cabinets and gathered the necessary tools and equipment, it’s time to start applying paint. Here are some key techniques to achieve a professional finish:
4.1: Start with a Brush
- Begin by using a high-quality brush to paint the corners, edges, and other intricate details of the cabinet doors and frames. This ensures that you get into all the nooks and crannies.
4.2: Follow with a Roller
- After using a brush, switch to a foam roller to apply paint to larger, flat surfaces. Rollers provide a smoother finish and help avoid brush marks.
4.3: Work in Thin, Even Coats
- Apply paint in thin, even coats to prevent drips and achieve a uniform finish. Multiple thin coats are better than one thick coat.
4.4: Feather the Edges
- To avoid visible lines where paint strokes overlap, feather the edges by lightly blending the wet paint with the dry paint using your brush or roller.
4.5: Maintain a Wet Edge
- When working with larger cabinet surfaces, make sure to keep a “wet edge” to prevent lap marks. This means that you should paint continuously without letting the paint dry in between sections.
4.6: Paint in a Controlled Environment
- Avoid painting in extreme heat or humidity, as it can affect the drying time and finish of the paint.
4.7: Pay Attention to Drying Time
- Follow the recommended drying times between coats as specified by the paint manufacturer. Rushing this step can lead to a less professional-looking finish.
4.8: Sand Between Coats
- Lightly sand the cabinets between coats of paint with a fine-grit sandpaper (220 grit) to ensure a smooth and even finish.
4.9: Use Proper Ventilation
- Adequate ventilation is essential when working with paint. Open windows and doors or use fans to ensure good air circulation.
4.10: Practice Patience
- Achieving a professional finish takes time and patience. Don’t rush the process, and allow adequate drying time between coats.
By employing these painting techniques, you’ll be well on your way to giving your kitchen cabinets a polished and professional appearance. In the next article, we’ll address the question: “How can I add decorative accents or designs to my painted kitchen cabinets?” Stay tuned for more tips on customizing your cabinets.
Article 5: Adding Decorative Accents and Designs to Painted Cabinets
If you want to take your kitchen cabinet makeover to the next level and add some unique flair, consider incorporating decorative accents and designs. Here’s how to do it like a pro:
5.1: Stencils and Templates
- Stencils and templates are great tools for adding patterns or designs to cabinet doors. You can create intricate designs or simple geometric shapes with ease.
5.2: Decals and Transfers
- Decorative decals and transfers can be applied directly to your cabinet surfaces. They come in various styles and can be a quick way to add character to your cabinets.
5.3: Faux Finishes
- Experiment with faux finishes like distressing or antiquing to give your cabinets a weathered, rustic look.
5.4: Glass Inserts
- Consider replacing some cabinet door panels with glass inserts. You can then paint the frames for a unique, open shelving effect.
5.5: Two-Tone Cabinets
- Create a striking contrast by painting the upper and lower cabinets in different colors. This can add depth and visual interest to your kitchen.
5.6: Beadboard Inserts
- Installing beadboard or panel inserts in cabinet doors can give your kitchen a charming, cottage-style look.
5.7: Hardware
- Don’t underestimate the impact of stylish knobs and pulls. Choose hardware that complements your cabinet design.
5.8: Molding and Trim
- Enhance the elegance of your cabinets by adding decorative molding and trim around the edges.
5.9: Open Shelving
- Remove cabinet doors altogether or replace them with open shelving to showcase your dishes and add a touch of openness to your kitchen.
5.10: Personalize with Paint
- Get creative by hand-painting decorative motifs, patterns, or even your favorite quotes onto your cabinet doors.
Adding decorative accents and designs allows you to infuse your personality into your kitchen cabinets. Whether you prefer a subtle touch or a bold statement, these techniques can help you achieve a truly custom and professional look.
In the next article, we’ll address the question: “How can I ensure the durability of my painted kitchen cabinets?” Stay tuned for expert advice on maintaining your cabinet finish for the long term.
Article 6: Ensuring the Durability of Painted Kitchen Cabinets
Achieving a professional look for your kitchen cabinets is not only about aesthetics but also about ensuring the longevity of the finish. Here are some tips to make sure your cabinets stay looking great for years to come:
6.1: Use a Durable Paint
- Choose a paint specifically formulated for cabinets and high-traffic areas. These paints are designed to withstand wear and tear.
6.2: Apply a Clear Protective Finish
- After the paint has fully cured, consider applying a clear polyurethane or varnish to provide an extra layer of protection.
6.3: Properly Cure the Paint
- Allow your cabinets to cure for at least several days or even a week before reinstalling cabinet hardware and loading them with items. This ensures the paint fully hardens.
6.4: Handle Cabinets with Care
- Be gentle when opening and closing cabinet doors. Avoid slamming them, as this can chip or dent the paint.
6.5: Clean Regularly
- Maintain your cabinets by regularly wiping them down with a damp cloth to remove dust and prevent dirt buildup.
6.6: Avoid Harsh Cleaners
- Use mild, non-abrasive cleaners to avoid damaging the painted surface. Harsh chemicals can strip the finish.
6.7: Repair Damage Promptly
- If you notice any chips or scratches, repair them promptly to prevent further damage. Touch up paint can help with small imperfections.
6.8: Monitor Humidity
- Fluctuations in humidity can affect the durability of paint. Use a dehumidifier in humid climates and ensure proper ventilation.
6.9: Protect from Direct Sunlight
- Prolonged exposure to direct sunlight can fade paint over time. Consider using window treatments to protect your cabinets.
6.10: Routine Maintenance
- Periodically inspect your cabinets for any signs of wear or damage. Catching issues early can prevent more extensive repairs later.
By following these durability tips, you’ll ensure that your professionally painted kitchen cabinets stay looking fresh and vibrant for years to come. In the next article, we’ll address the question: “What are some common mistakes to avoid when painting kitchen cabinets?” Stay tuned to learn from the experiences of others and enhance your cabinet painting skills.
Article 7: Common Mistakes to Avoid When Painting Kitchen Cabinets
When painting kitchen cabinets, it’s essential to be aware of common mistakes that can compromise the professional finish you desire. Here are some pitfalls to avoid:
7.1: Skipping Proper Preparation
- Rushing through the prep work, such as cleaning, sanding, and priming, can result in paint adhesion issues and an uneven finish.
7.2: Neglecting to Label Cabinet Doors
- If you remove cabinet doors to paint them separately, be sure to label them so you can easily match them to their respective cabinets later.
7.3: Using the Wrong Paintbrush or Roller
- Choosing the wrong brush or roller can lead to streaks, brush marks, or an uneven coat of paint.
7.4: Applying Too Thick a Coat of Paint
- Thick coats of paint can lead to drips, uneven drying, and a less professional look. Opt for multiple thin coats instead.
7.5: Ignoring Proper Drying Times
- Rushing through the drying process can result in smudging, sticking, or damage to the finish. Follow the recommended drying times.
7.6: Painting in the Wrong Conditions
- Avoid painting on extremely humid or hot days, as it can affect paint drying and adhesion.
7.7: Overlooking Hardware and Hinges
- Painting over hardware or hinges without proper preparation can lead to chipping or difficulty in operation.
7.8: Not Testing Paint Colors
- Skipping the step of testing paint colors on a small area can result in regrettable color choices.
7.9: Disregarding Safety
- Always work in a well-ventilated area, wear appropriate safety gear, and follow paint manufacturer’s instructions for safe use.
7.10: Neglecting Routine Maintenance
- Failing to clean and maintain your cabinets regularly can lead to premature wear and tear.
By avoiding these common mistakes, you’ll be better equipped to achieve a professional finish when painting your kitchen cabinets. In the next article, we’ll address the question: “How can I budget and plan for a cabinet painting project?” Stay tuned for tips on successfully managing your kitchen cabinet makeover.
Article 8: Budgeting and Planning for a Cabinet Painting Project
Planning and budgeting are essential steps in ensuring a successful cabinet painting project. Here’s how to manage your project effectively:
8.1: Assess the Scope
- Determine the size of your project, including the number of cabinets, their condition, and any additional work needed, such as decorative accents or hardware replacement.
8.2: Set a Budget
- Establish a realistic budget that covers paint, primer, tools, and any other materials or services you may require.
8.3: Research Costs
- Get quotes for paint, primer, and materials. Compare prices from different suppliers to find the best deals.
8.4: Plan Your Timeline
- Decide when you want to start and finish the project. Consider any upcoming events or holidays that may affect your schedule.
8.5: Gather Supplies
- Create a list of all the tools and materials you’ll need, such as brushes, rollers, sandpaper, and paint, and purchase them in advance.
8.6: Allocate Time
- Estimate how much time you’ll need for each phase of the project, from preparation to painting to drying.
8.7: Consider Professional Help
- If you’re unsure about your painting skills or the project’s complexity, consult with professional painters for estimates.
8.8: Contingency Plan
- Set aside a small budget for unexpected expenses or changes in the project scope.
8.9: DIY or Hire Help
- Decide whether you want to tackle the project yourself or hire professionals. DIY can save money, but professionals ensure a flawless finish.
8.10: Quality over Quantity
- Prioritize quality materials and workmanship over trying to cut costs. Investing in the right products will lead to a professional result.
By budgeting and planning your cabinet painting project meticulously, you can ensure that you have the resources, time, and knowledge needed to achieve a professional look. In the final article of this series, we’ll address the question: “How can I maintain my painted kitchen cabinets to keep them looking professional?” Stay tuned for tips on long-term cabinet maintenance.
Read: What to Do When You Don’t Have Enough Paint for Kitchen Cabinets
