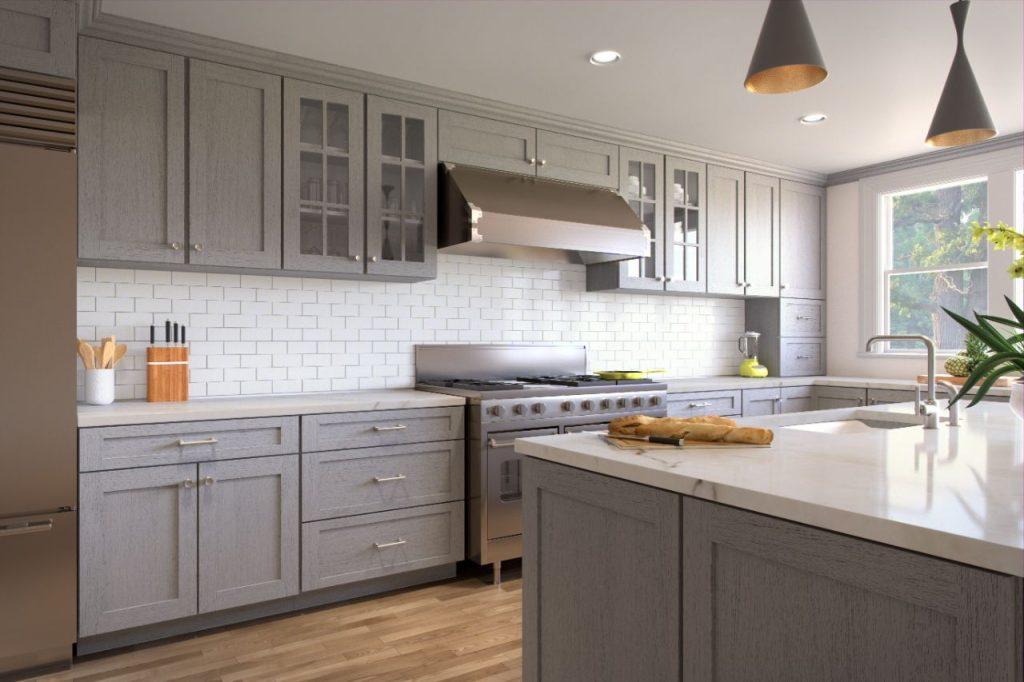
How to Give Your Kitchen Cabinets a New Look for Less
In this comprehensive guide, we will explore various ways to transform the appearance of your kitchen cabinets without breaking the bank. Whether you’re looking to refresh your kitchen’s style or preparing your home for sale, giving your cabinets a new look can make a significant difference. We’ll address the top 10 questions people have about this topic, providing you with practical advice and cost-effective solutions.
1. How Can I Paint My Kitchen Cabinets Like a Pro?
When it comes to giving your kitchen cabinets a fresh look, painting is one of the most cost-effective options. Follow these steps to achieve professional-looking results:
Materials You’ll Need:
- Screwdriver
- Sandpaper (120-220 grit)
- Painter’s tape
- Primer
- Paint
- Paintbrushes or rollers
- Drop cloths
Steps to Paint Your Cabinets:
- Remove the cabinet doors and hardware.
- Clean the cabinets thoroughly to remove grease and dirt.
- Sand the surfaces to create a smooth and paint-ready finish.
- Apply a coat of primer to help the paint adhere better.
- Paint the cabinets with your chosen color, using even strokes.
- Allow the paint to dry completely, then add a second coat if necessary.
- Reattach the doors and hardware.
To make the process even smoother, consider using a paint sprayer for a more professional finish. Don’t forget to choose a paint color that complements your kitchen’s overall aesthetic.
For a more detailed guide on cabinet painting, check out our [Cabinet Painting 101] table below:
| Task | Tools/Supplies Needed | Tips |
|---|---|---|
| Preparation | Screwdriver, sandpaper, tape | Remove doors, hardware, clean, and sand the cabinet surfaces. |
| Priming | Primer | Use a quality primer for better paint adhesion. |
| Painting | Paint, brushes/rollers | Apply paint evenly and let it dry between coats. |
| Reassembly | Screwdriver | Reattach doors and hardware carefully. |
By following these steps and using the right materials, you can paint your kitchen cabinets like a pro and achieve a stunning transformation on a budget.
Stay tuned for more kitchen cabinet makeover tips in the upcoming sections!
2. What Are Some Affordable Cabinet Hardware Upgrades?
When aiming to give your kitchen cabinets a fresh look, updating the hardware can make a significant impact without a hefty price tag. Here are some affordable cabinet hardware upgrades to consider:
1. Cabinet Knobs and Pulls:
Replacing old or outdated knobs and pulls with new ones can instantly change the cabinet’s appearance. Opt for styles that match your kitchen’s theme, whether it’s modern, traditional, or eclectic.
2. Handles and Bar Pulls:
Handles and bar pulls are sleek and modern options that can provide a contemporary touch to your cabinets. They are available in various sizes and finishes, allowing you to customize the look.
3. Hinges:
Upgrading your cabinet hinges to concealed or soft-close options can not only improve functionality but also enhance the overall aesthetic. They give cabinets a cleaner and more streamlined appearance.
4. Backplates:
Consider adding decorative backplates behind knobs or pulls. They can protect your cabinet surfaces and add an extra layer of style.
5. Paint or Spray Paint:
If you’re on a tight budget, you can refresh your existing hardware by painting or spray-painting them in a new finish. Metallic finishes like gold or brushed nickel are trendy choices.
Remember to measure your existing hardware’s hole spacing to ensure the new pieces fit perfectly. Installing new hardware is a simple DIY project that can instantly revamp your kitchen cabinets.
3. Can I Reface My Cabinets Instead of Replacing Them?
Refacing your kitchen cabinets is a fantastic way to give them a fresh look without the cost and hassle of a full cabinet replacement. Here’s how you can go about cabinet refacing:
Steps to Reface Your Cabinets:
- Evaluate Your Cabinets: First, assess the condition of your existing cabinets. If the cabinet boxes are still structurally sound, refacing can be a great option.
- Choose Refacing Materials: Decide on the materials you’ll use for refacing. Common options include veneer, laminate, or solid wood. Pick a finish that complements your kitchen’s style.
- Remove Doors and Drawers: Take off the cabinet doors and drawers. Remove any hardware or knobs.
- Apply New Veneer or Laminate: Cover the cabinet boxes and exposed surfaces with your chosen material. Ensure it’s cut precisely to fit the dimensions.
- Replace Doors and Drawer Fronts: Install new cabinet doors and drawer fronts that match the refacing material. Make sure they align correctly.
- Add New Hardware: Choose stylish knobs or handles to complete the updated look.
- Paint or Stain: If you wish to change the color of your cabinets, now is the time to paint or stain the cabinet boxes to match the new doors and drawer fronts.
- Install Accessories: Consider adding accessories like crown molding, valances, or trim for an extra touch of elegance.
Cabinet refacing allows you to transform your kitchen’s appearance while keeping the existing cabinet layout. It’s a more budget-friendly option than a complete replacement and can be a rewarding DIY project.
4. What Are Some Budget-Friendly Cabinet Makeover Ideas?
Not everyone has the budget for a full kitchen cabinet renovation. However, there are plenty of budget-friendly ideas to give your cabinets a makeover. Here are some creative options:
1. Open Shelving:
Remove cabinet doors from a few upper cabinets to create open shelves. This not only opens up your kitchen but also provides an opportunity to display decorative items or colorful dishes.
2. Glass Inserts:
For a touch of sophistication, consider replacing some cabinet doors with glass inserts. It adds visual interest and can make your kitchen feel more spacious.
3. Wallpaper or Contact Paper:
Applying wallpaper or contact paper to the interior of your cabinet doors can introduce patterns or textures that complement your kitchen’s style.
4. Cabinet Lighting:
Under-cabinet lighting can transform the ambiance in your kitchen. LED strip lights are energy-efficient and come in various colors to set the mood.
5. Decorative Decals:
Add removable decorative decals to your cabinet doors or drawer fronts. They are an affordable and easy way to introduce new patterns or designs.
6. Repurpose Old Furniture:
Consider repurposing old furniture pieces like dressers or chests as kitchen cabinets. With a fresh coat of paint and some modifications, they can become unique and stylish storage solutions.
7. Painted Accents:
Painting the cabinet frames or just the island cabinets in a contrasting color can create a focal point in your kitchen.
Budget-friendly cabinet makeovers are all about creativity and resourcefulness. Explore these ideas to give your kitchen a fresh look without straining your wallet.
5. How Can I Make My Cabinets Look Rustic or Distressed?
Creating a rustic or distressed look for your kitchen cabinets can add character and charm to your space. Follow these steps to achieve that sought-after aged appearance:
Materials You’ll Need:
- Screwdriver
- Sandpaper (80-100 grit for distressing)
- Chalk paint or matte paint
- Paintbrushes
- Soft wax or clear sealer
- Antiquing glaze (optional)
- Rags
Steps to Create a Rustic or Distressed Look:
- Remove Cabinet Hardware: Begin by taking off all cabinet hardware, including knobs and pulls.
- Clean Cabinets: Clean the cabinet surfaces to remove any dirt, grease, or residues.
- Sand Cabinets: For a distressed look, use 80-100 grit sandpaper to sand the edges, corners, and raised areas of the cabinet doors and frames. This will expose the wood underneath.
- Paint Cabinets: Apply a base coat of chalk paint or matte paint in your desired color. Allow it to dry completely.
- Distress Edges: Use the sandpaper again to gently distress the painted surfaces. Focus on edges, corners, and any areas where natural wear would occur over time. Sand until you achieve the desired level of distressing.
- Apply Wax or Sealer: To protect the finish and enhance the distressed look, apply a soft wax or clear sealer. You can also add antiquing glaze for a more aged appearance.
- Reattach Hardware: Once everything is dry and sealed, reattach the cabinet hardware.
A rustic or distressed cabinet finish can give your kitchen a cozy and timeless atmosphere. Experiment with different paint colors and distressing techniques to achieve the look that suits your style best.
6. How Can I Make My Cabinets More Functional?
Improving the functionality of your kitchen cabinets is a practical way to give them a new look while enhancing your daily cooking and storage experience. Here are some tips:
1. Pull-Out Shelves:
Install pull-out shelves inside your cabinets. These make it easier to access items stored at the back and maximize your storage space.
2. Lazy Susans:
Lazy Susans are great for corner cabinets. They allow you to rotate the shelves, making it simpler to reach items in the back.
3. Drawer Dividers:
Use drawer dividers to organize utensils, cutlery, and kitchen gadgets efficiently.
4. Roll-Out Trays:
Roll-out trays are ideal for pots, pans, and baking sheets. They ensure easy access and prevent the need to bend down and reach into the depths of the cabinet.
5. Cabinet Organizers:
Consider installing cabinet organizers like pull-out trash cans, spice racks, or pull-out pantry shelves for improved functionality.
6. Upgrade Hardware:
Replace old cabinet hardware with soft-close hinges and drawer slides. This small upgrade can make a big difference in daily use.
7. Over-the-Door Storage:
Maximize vertical space by adding over-the-door storage racks or hooks inside cabinet doors.
Enhancing the functionality of your cabinets not only makes your kitchen more efficient but also gives it a more organized and polished look. Assess your kitchen’s specific needs and customize your cabinet upgrades accordingly.
7. How Can I Remove Old Stains or Discoloration from Cabinet Surfaces?
Over time, kitchen cabinets can develop stains or discoloration due to exposure to various substances, such as cooking oils, grease, or even smoke. To restore their original appearance, follow these steps:
Materials You’ll Need:
- Mild dish soap
- Warm water
- Microfiber cloths or sponges
- Baking soda
- Water-based wood cleaner
- Fine steel wool (0000 grade)
- Wood stain (if necessary)
- Polyurethane sealer (if necessary)
Steps to Remove Stains or Discoloration:
- Prepare a Cleaning Solution: Mix warm water and mild dish soap to create a gentle cleaning solution.
- Wipe Down Cabinets: Dip a microfiber cloth or sponge into the soapy water and gently wipe down the stained or discolored areas. Be sure not to soak the wood.
- Rinse and Dry: Use a clean, damp cloth to rinse off the soapy residue, then dry the cabinets thoroughly.
- Apply Baking Soda Paste: For stubborn stains, make a paste using baking soda and water. Apply the paste to the stained area, gently rub in a circular motion, and then wipe it away with a clean, damp cloth.
- Use Wood Cleaner: If the stains persist, try a water-based wood cleaner. Follow the product’s instructions carefully, as different cleaners have varying application methods.
- Sand Lightly: If the discoloration remains after cleaning, use fine steel wool (0000 grade) to sand the affected area gently. Sand with the wood grain to avoid visible scratches.
- Restain and Seal (if necessary): If the discoloration is still noticeable, you may need to restain the affected areas to match the rest of the cabinet. After staining, apply a polyurethane sealer to protect the wood and maintain its appearance.
Regular cleaning and maintenance can prevent stains and discoloration from becoming a major issue. Keep your cabinets looking their best by wiping down surfaces regularly and addressing any spills promptly.
8. How Can I Add Depth and Dimension to My Cabinet Design?
Adding depth and dimension to your kitchen cabinet design can make a significant impact on the overall aesthetic of your kitchen. Here are some creative ways to achieve this:
1. Two-Tone Cabinets:
Paint the upper and lower cabinets in different colors to create visual contrast. For example, have darker lower cabinets and lighter upper cabinets.
2. Glass Cabinet Doors:
Incorporate glass doors into some of your upper cabinets. This not only adds depth but also allows you to showcase your favorite dishes or glassware.
3. Open Shelving:
Install open shelves in between or beside your upper cabinets. It breaks up the cabinetry and provides a place for displaying decorative items or plants.
4. Crown Molding:
Add crown molding to the top of your cabinets for an elegant and finished look. It also draws the eye upward, creating the illusion of taller cabinets.
5. Cabinet Lighting:
Install under-cabinet lighting to illuminate the countertop and create a warm ambiance. LED strip lights are energy-efficient and easy to install.
6. Decorative End Panels:
Consider adding decorative end panels to the sides of your cabinets. These panels can feature carved details or other design elements that enhance the overall look.
7. Beadboard or Wainscoting:
Apply beadboard or wainscoting to the cabinet ends or backs for a textured and dimensional effect.
By incorporating these design elements, you can transform your kitchen cabinets into a visually appealing focal point in your kitchen.
9. What Can I Do If My Cabinet Doors Are Damaged?
If your cabinet doors are damaged, whether from wear and tear or accidents, there are several options to address the issue:
1. Repair:
If the damage is minor, such as a small crack or scratch, you can often repair it by filling the imperfection with wood filler, sanding it smooth, and then refinishing or repainting the door.
2. Replacement:
If the damage is extensive or irreparable, you may need to replace the damaged door or drawer front. Many cabinet manufacturers offer replacement parts that match their existing product lines.
3. Reface:
Consider refacing the entire cabinet if multiple doors are damaged or if you want to give your kitchen a new look. Refacing involves replacing doors, drawer fronts, and covering the cabinet boxes with new material.
4. Repurpose:
If you’re feeling creative, repurpose damaged cabinet doors into decorative pieces or furniture. With some sanding and a fresh coat of paint, they can become unique wall art, headboards, or tables.
5. Professional Restoration:
For antique or high-value cabinets, consult a professional restoration expert. They have the expertise to repair and restore damaged cabinet doors while preserving their original charm.
10. How Can I Protect My Newly Refinished Cabinets?
After investing time and effort into refinishing your cabinets, it’s essential to protect them to ensure they stay looking their best for years to come. Here are some tips for cabinet maintenance:
1. Use Cabinet Hardware:
Install knobs and pulls on cabinet doors and drawers to prevent direct contact with the painted or stained surfaces. This helps minimize wear and tear.
2. Wipe Spills Promptly:
Clean up spills and splatters as soon as they occur to prevent staining or damage to the finish.
3. Avoid Harsh Cleaners:
Use mild, non-abrasive cleaners when cleaning your cabinets. Avoid harsh chemicals or abrasive scrubbers that can damage the finish.
4. Use Cabinet Liners:
Consider placing cabinet liners or shelf liners inside your cabinets to protect the shelves from scratches and stains.
5. Regular Cleaning:
Regularly dust and wipe down your cabinets with a damp, soft cloth to remove dust and dirt. This prevents the buildup of grime over time.
6. Reapply Sealer:
If your cabinets have a clear sealer, periodically check for wear and reapply it as needed to maintain the protective barrier.
By following these maintenance tips, you can ensure that your newly refinished cabinets remain in excellent condition, preserving the beauty of your kitchen for years to come.
In this comprehensive guide, we’ve covered ten essential questions about how to give your kitchen cabinets a new look for less. Whether you’re considering painting, updating hardware, refacing, or tackling more significant changes, these tips and techniques will help you transform your kitchen without breaking the bank. Remember that the key to a successful cabinet makeover is careful planning, attention to detail, and a touch of creativity. Choose the strategies that best suit your budget and style, and enjoy your refreshed kitchen space!
