Get the Look of New Kitchen Cabinets Without Spending Much Money
1. How can I refresh the look of my kitchen cabinets on a budget?
Updating the appearance of your kitchen cabinets doesn’t have to break the bank. There are several cost-effective ways to give your cabinets a fresh look without spending a fortune. Here are some budget-friendly ideas:
- Painting: One of the most affordable ways to transform your cabinets is by painting them. Choose a new color that complements your kitchen’s overall theme. Make sure to clean and sand the cabinets properly before applying the paint for a smooth finish.
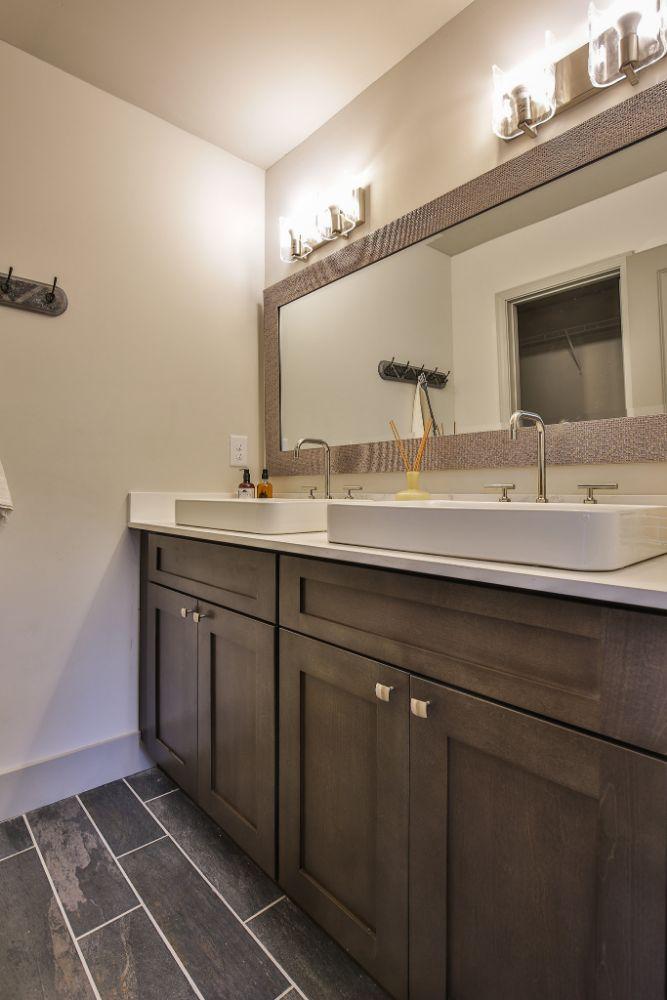
- New Hardware: Replacing the cabinet knobs and handles can make a big difference. Choose modern or stylish hardware that matches your kitchen’s aesthetic. This simple change can give your cabinets a whole new look.
- Peel-and-Stick Wallpaper: Consider using peel-and-stick wallpaper to add a pop of pattern or texture to your cabinet doors. It’s easy to apply and remove, making it a great option for renters.
- Open Shelving: Remove the cabinet doors altogether and create open shelving. Display your dishes and kitchenware neatly for an open and airy feel. This also encourages you to keep things organized.
- Contact Paper: For a quick and temporary change, use contact paper to cover cabinet surfaces. There are countless designs and colors available, allowing you to get creative.
- Cabinet Refacing: If your cabinet frames are in good condition, consider refacing the doors and drawer fronts. This involves applying a new veneer or laminate to the existing surface, giving the appearance of new cabinets.
- Lighting: Install under-cabinet lighting to highlight your cabinets and countertops. It not only enhances the visual appeal but also improves functionality.
- Crown Molding: Add crown molding to the top of your cabinets for a polished and upscale look. It’s a small addition that can make a big impact.
- Deep Cleaning: Sometimes, all your cabinets need is a thorough cleaning. Use a good-quality wood cleaner to remove built-up grease and grime, revealing the cabinet’s original beauty.
- DIY Decor: Place decorative items strategically on top of your cabinets. This can draw the eye upward and divert attention away from outdated or worn cabinet surfaces.
Incorporating these budget-friendly ideas can help you achieve the look of new kitchen cabinets without spending a fortune. Mix and match these suggestions to create a kitchen that suits your style and budget.
2. Are there eco-friendly options for updating kitchen cabinets inexpensively?
Yes, there are eco-friendly options for updating your kitchen cabinets without breaking the bank. Many sustainable choices can help you achieve a fresh look while minimizing your environmental impact. Here are some eco-friendly ideas:
- Repurposing: Consider repurposing old cabinets or using salvaged materials. You can often find high-quality, used cabinets at thrift stores or online marketplaces. Refinish or paint them to match your kitchen’s style.
- Low-VOC Paint: When painting your cabinets, choose low-VOC (volatile organic compound) or no-VOC paint. These paints are less harmful to the environment and your health.
- Bamboo Cabinet Doors: Bamboo is a fast-growing and renewable resource. You can replace your cabinet doors with bamboo ones for a sustainable upgrade.
- Recycled Glass: Consider installing cabinet doors with recycled glass inserts. This not only adds a unique touch to your kitchen but also promotes recycling.
- Upcycled Hardware: Instead of buying new cabinet knobs and handles, look for upcycled or vintage hardware. Antique stores and flea markets are great places to find unique pieces.
- Reclaimed Wood: Use reclaimed wood to create open shelving or replace cabinet doors. This not only adds character to your kitchen but also reduces the demand for new timber.
- Energy-Efficient Lighting: If you’re adding or updating cabinet lighting, opt for energy-efficient LED fixtures. They consume less electricity and last longer.
- Recycled Countertops: While updating your cabinets, consider using recycled or upcycled materials for your countertops. Recycled glass, concrete, or reclaimed wood can be excellent options.
- Donate or Recycle Old Cabinets: If you’re replacing your cabinets entirely, try to donate or recycle the old ones instead of sending them to a landfill.
- DIY Green Cleaners: Use homemade or eco-friendly cleaning solutions to clean and maintain your cabinets. These options are less harmful to the environment than harsh chemicals.
By incorporating these eco-friendly ideas into your kitchen cabinet update, you can reduce your carbon footprint while giving your kitchen a fresh and stylish look. Making sustainable choices doesn’t have to be expensive, and it can contribute to a greener future.
3. Can I change the color of my kitchen cabinets without sanding?
Changing the color of your kitchen cabinets without sanding is possible, but it depends on the current condition and finish of your cabinets. Here are two methods you can consider:
- Deglosser: A deglosser is a liquid solution that can help paint adhere to the existing cabinet finish without the need for extensive sanding. You’ll need to thoroughly clean your cabinets, apply the deglosser according to the manufacturer’s instructions, and then paint over it. This method works best if your cabinets are in good condition and the existing finish is not peeling or damaged.
- Chalk Paint: Chalk paint is known for its ability to adhere to various surfaces without extensive prep work. While it’s not always necessary to sand, you should still clean your cabinets thoroughly before applying chalk paint. Chalk paint has a unique matte finish, and it can give your cabinets a rustic or vintage look. Keep in mind that it may require a protective wax or sealer after painting for durability.
However, if your cabinets have a glossy or heavily varnished finish, it’s still advisable to lightly sand them to create a better surface for paint adhesion. Sanding doesn’t have to be a time-consuming process; a quick scuffing with fine-grit sandpaper can often suffice.
Before starting any cabinet painting project, it’s essential to test your chosen method on a small, inconspicuous area to ensure it adheres well and provides the desired finish. Additionally, proper cleaning and preparation are key to achieving a long-lasting and professional-looking result.
Remember that the success of a no-sanding approach largely depends on the quality of the products you use and the condition of your cabinets.
4. What are some creative ways to add storage space to kitchen cabinets?
If you’re looking to maximize the storage space in your kitchen cabinets, there are several creative solutions you can consider. Here are some ideas to help you make the most of your cabinet space:
- Pull-Out Shelves: Install pull-out shelves or drawers inside your cabinets. These make it easy to access items at the back of the cabinet without having to reach or dig deep. They work well for pots, pans, and small appliances.
- Lazy Susans: Lazy Susans are rotating trays that can be installed in corner cabinets. They make it easy to access items tucked away in the corners and utilize the entire cabinet space efficiently.
- Drawer Dividers: Use drawer dividers and organizers to keep utensils, cutlery, and kitchen tools neatly organized. This prevents clutter and maximizes drawer space.
- Cabinet Door Organizers: Mount organizers on the inside of cabinet doors. These can hold items like cutting boards, pot lids, and cleaning supplies, freeing up shelf space.
- Tension Rods: Install tension rods vertically inside your cabinets. You can hang items like baking sheets, cutting boards, and even cleaning supplies from these rods.
- Under-Cabinet Hooks: Add hooks or racks under your upper cabinets to hang mugs, cups, or even small pots and pans. This frees up valuable shelf space for other items.
- Plate Racks: Install plate racks inside your cabinets to store plates vertically. This not only saves space but also prevents plates from chipping or scratching.
- Pull-Out Pantry: Consider a pull-out pantry unit that can be installed in a narrow cabinet space. It provides easy access to pantry items without taking up much room.
- Floating Shelves: Install floating shelves on open wall spaces in your kitchen. These can hold dishes, cookbooks, or decorative items, reducing the need for additional cabinet space.
- Overhead Pot Rack: If you have high ceilings, consider installing an overhead pot rack. This keeps pots and pans easily accessible and adds a decorative element to your kitchen.
- Clear Containers: Store dry goods like pasta, rice, and cereal in clear, airtight containers. Not only does this keep your pantry organized, but it also helps you see what you have at a glance.
- Stackable Bins: Use stackable bins or baskets to group similar items together in your cabinets. This prevents items from getting lost and makes it easier to access what you need.
- Magnetic Strips: Attach magnetic strips to the inside of cabinet doors to store spice jars, knives, or metal utensils. It’s a space-saving solution that keeps these items within easy reach.
- Custom Inserts: Consider investing in custom cabinet inserts or dividers that are designed to fit your specific cabinet dimensions. They can optimize storage for your unique needs.
By implementing these creative storage solutions, you can make the most of your kitchen cabinets and keep your kitchen organized and clutter-free.
5. How can I make my old kitchen cabinets look rustic and charming?
If you want to give your old kitchen cabinets a rustic and charming makeover, there are several design elements and techniques you can use. Here’s how to achieve that rustic look:
- Distressed Finish: Create a distressed look on your cabinets by sanding edges and corners to expose the underlying wood. You can also use tools like chains or hammers to create small dents and nicks for an aged appearance.
- Weathered Paint: Apply a weathered paint finish in muted, earthy colors like soft grays, blues, or creams. After painting, lightly sand the surface to reveal some of the wood underneath, giving it a rustic patina.
- Reclaimed Wood Accents: Incorporate reclaimed wood into your kitchen design. You can use it for open shelving, cabinet doors, or as decorative elements. Reclaimed wood adds character and authenticity to the space.
- Barn Door Hardware: Consider using barn door hardware for your cabinet doors. This not only adds a rustic touch but also makes the doors slide rather than swing, saving space in tight kitchens.
- Open Shelving: Remove some cabinet doors and replace them with open shelves made from reclaimed wood or rough-hewn lumber. Display rustic dishes and decorative items on these shelves.
- Rustic Knobs and Pulls: Upgrade your cabinet hardware to rustic knobs and pulls made of materials like wrought iron, hammered copper, or antique brass. These details can instantly transform the look of your cabinets.
- Farmhouse Sink: Install a farmhouse or apron-front sink, which is a classic rustic feature. It pairs well with rustic cabinets and adds a charming focal point to your kitchen.
- Wood Beams: If your kitchen has high ceilings, consider adding wood beams for a rustic, cottage-like atmosphere. They can be stained or painted to match your cabinet finish.
- Vintage Accessories: Decorate your kitchen with vintage accessories like mason jar pendant lights, old-fashioned scales, and antique kitchen tools. These items evoke a nostalgic, rustic feel.
- Natural Stone Countertops: Opt for natural stone countertops like granite or soapstone. Their natural textures and imperfections enhance the rustic vibe.
- Open Cabinet Design: Remove some cabinet doors altogether to create open cabinets. This allows you to showcase rustic dishware and adds an airy feel to the kitchen.
- Copper Accents: Use copper accents in your kitchen, such as a copper range hood or copper pendant lights. Copper’s warm tones complement rustic aesthetics.
By incorporating these design elements and techniques, you can give your old kitchen cabinets a charming and rustic makeover that adds character and warmth to your home.
6. What are the pros and cons of refinishing kitchen cabinets myself?
Refinishing kitchen cabinets yourself can be a cost-effective way to update your kitchen, but it’s essential to consider the pros and cons before taking on this DIY project:
Pros of DIY Cabinet Refinishing:
- Cost Savings: Doing the work yourself can save you a significant amount of money compared to hiring a professional cabinet refinisher.
- Customization: You have full control over the color, finish, and style of your cabinets, allowing you to achieve the exact look you want.
- Learning Experience: DIY cabinet refinishing can be a valuable learning experience, helping you acquire new skills and knowledge about home improvement.
- Satisfaction: Completing the project on your own can be highly rewarding and give you a sense of accomplishment.
- Flexibility: You can work on the project at your own pace and make adjustments as needed.
Cons of DIY Cabinet Refinishing:
- Time-Consuming: Refinishing cabinets is a time-intensive project that may take several days or even weeks, depending on the scope and complexity.
- Skill Requirement: Achieving a professional-looking finish requires skill in painting and woodworking. Inexperienced DIYers may struggle to achieve the desired results.
- Tools and Materials: You’ll need to invest in various tools, materials, and safety equipment, which can add to the overall cost.
- Potential for Errors: DIY projects carry the risk of mistakes, which can be costly to correct. Uneven paint application, drips, and brush marks are common issues.
- Disruption: Kitchen cabinet refinishing can disrupt your daily routine, as you may need to empty and disassemble cabinets and find alternative cooking and storage solutions.
- Durability: DIY finishes may not be as durable as professionally applied ones, potentially requiring more frequent touch-ups and maintenance.
- Resale Value: If not done to a high standard, DIY cabinet refinishing could negatively impact the resale value of your home.
- Health and Safety: Working with chemicals and paints can pose health risks if not handled properly. Proper ventilation and safety precautions are essential.
Before embarking on a DIY cabinet refinishing project, assess your skills, the time you can commit, and your willingness to tackle a challenging endeavor. If you’re uncertain about your abilities, consulting a professional may be a wise choice to ensure a satisfactory outcome.
7. What is the difference between cabinet refacing and cabinet refinishing?
Cabinet refacing and cabinet refinishing are two distinct approaches to updating the look of your kitchen cabinets. Each method has its advantages and considerations. Here’s a breakdown of the key differences:
Cabinet Refacing:
- Replacement of Cabinet Doors: In cabinet refacing, the existing cabinet doors and drawer fronts are entirely replaced with new ones. These new components typically come in a variety of styles and finishes.
- Exterior Veneer Application: A thin layer of veneer or laminate is applied to the visible exterior surfaces of the cabinet frames. This veneer can match the style of the new doors.
- Hardware Upgrade: Cabinet refacing often includes upgrading the cabinet hardware, such as knobs and handles, to complement the new look.
- Customization: Cabinet refacing allows for customization in terms of door style, finish, and hardware selection.
- Preservation of Cabinet Structure: The cabinet boxes or frames remain intact, and only the outward appearance is changed. This method is suitable when the existing cabinets are structurally sound.
- Duration: Cabinet refacing is typically faster than a full cabinet replacement, making it a less disruptive option.
Cabinet Refinishing:
- Surface Treatment: Cabinet refinishing involves sanding and stripping the existing cabinet surfaces to remove the old finish. The cabinets are then painted, stained, or refinished to achieve a new look.
- Preservation of Cabinet Structure: Like cabinet refacing, cabinet refinishing retains the original cabinet boxes and frames, making it suitable for cabinets in good structural condition.
- Cost-Effective: Refinishing is generally more budget-friendly than refacing, as it doesn’t involve the cost of new doors and drawer fronts.
- Limitations: Cabinet refinishing may have limitations in terms of dramatically changing the style or design of the cabinets. It works best when you want to update the color or finish.
- Time-Consuming: While it can be done as a DIY project, cabinet refinishing can be time-consuming, especially if there are multiple coats of paint or finish to remove.
- Skill Requirement: Achieving a professional-looking finish in cabinet refinishing requires skill in sanding, painting, and finishing.
- Surface Imperfections: Depending on the condition of the cabinets and the refinishing process, surface imperfections like grain or wood knots may still be visible.
Choosing between cabinet refacing and cabinet refinishing depends on your goals, budget, and the condition of your existing cabinets. If you want a complete transformation and have the budget for it, refacing may be the better option. However, if you’re looking for a cost-effective way to refresh the look of your cabinets without a complete overhaul, refinishing can be a viable choice.
8. How can I make my kitchen cabinets look modern and sleek?
If you want to give your kitchen cabinets a modern and sleek appearance, there are several design choices and elements you can incorporate. Here’s how to achieve a contemporary look:
- Clean Lines: Opt for cabinets with flat or slab-style doors, which feature clean, straight lines and minimal detailing. This creates a sleek and uncluttered appearance.
- High-Gloss Finishes: Consider high-gloss or lacquer finishes for your cabinet doors. These reflective surfaces add a modern touch and make your cabinets appear more polished.
- Monochromatic Color Scheme: Choose a monochromatic color scheme, such as all-white or all-gray cabinets. This creates a streamlined and cohesive look in the kitchen.
- Handleless Cabinets: Explore handleless cabinet designs, where cabinet doors have integrated handles or touch-to-open mechanisms. This eliminates the need for visible hardware and contributes to a sleek look.
- Open Shelving: Incorporate open shelving for a modern twist. Displaying dishes and glassware on open shelves can add a contemporary feel to the space.
- Under-Cabinet Lighting: Install LED under-cabinet lighting to illuminate countertops and provide a modern ambiance. LED strips or puck lights work well for this purpose.
- Floating Cabinets: Consider floating or wall-mounted cabinets. These cabinets are attached to the wall without visible legs, creating a floating effect that enhances the modern aesthetic.
- Glass Cabinet Doors: Use glass cabinet doors to showcase modern dinnerware or decorative items. Frosted or tinted glass can add a touch of sophistication.
- Minimalist Hardware: If you prefer hardware, choose sleek and minimalist handles or pulls in finishes like brushed nickel or matte black. Keep them simple and unobtrusive.
- Integrated Appliances: Invest in integrated appliances that blend seamlessly with your cabinets. This creates a cohesive and streamlined look in the kitchen.
- Quartz Countertops: Opt for quartz countertops, which come in various modern and sleek designs. They are durable and easy to maintain.
- Geometric Backsplash: Choose a geometric or patterned backsplash to add visual interest and a modern focal point to your kitchen.
- Open Plan Design: If possible, consider an open-plan kitchen layout, which is a hallmark of modern design. This promotes a sense of space and flow.
- Minimal Decor: Keep kitchen decor minimal and functional. Modern kitchens often feature a clutter-free look with few decorative items.
By incorporating these design elements and choices, you can achieve a modern and sleek look for your kitchen cabinets. Remember to maintain a balance between aesthetics and functionality to create a kitchen that not only looks contemporary but also works efficiently for your needs.
9. What are the benefits of using chalk paint for kitchen cabinets?
Chalk paint is a popular choice for refinishing kitchen cabinets due to its unique properties and benefits. Here are some advantages of using chalk paint for your kitchen cabinets:
- No Sanding or Priming: One of the most significant advantages of chalk paint is that it often doesn’t require extensive sanding or priming before application. This can save you time and effort in the preparation process.
- Easy Application: Chalk paint is easy to apply, even for beginners. Its thick consistency allows for smooth brush strokes, and it dries relatively quickly.
- Matte Finish: Chalk paint provides a matte finish that imparts a soft and rustic appearance to your cabinets. It’s ideal for achieving a vintage or shabby-chic look.
- Distressing Options: Chalk paint is perfect for distressing techniques. You can easily create a weathered or aged appearance by sanding and distressing the painted surface.
- Versatile Colors: Chalk paint comes in a wide range of colors, allowing you to choose the perfect shade to match your kitchen’s aesthetic.
- Low Odor: Chalk paint typically has a lower odor than traditional paints, making it a more pleasant option for indoor use.
- Wax or Sealant Finish: After painting, you can apply a clear wax or sealant to protect the finish and make it more durable. This step adds a subtle sheen to the cabinets.
- Minimal Brush Marks: Chalk paint tends to hide brush marks well, resulting in a smoother and more even finish.
- Distressed Look: If you desire a distressed or antique appearance, chalk paint is highly adaptable for achieving this style.
- Eco-Friendly Options: Some chalk paint brands offer eco-friendly and low-VOC formulations, making them safer for your health and the environment.
- Easy to Clean: Once sealed, chalk-painted cabinets are relatively easy to clean and maintain. A damp cloth can remove everyday dirt and grime.
- Endless DIY Possibilities: Chalk paint encourages creativity and DIY experimentation. You can use various techniques like layering colors, using stencils, or creating decorative designs.
Despite its many advantages, it’s essential to consider the drawbacks of chalk paint as well. It may not be the best choice for high-moisture areas, and it may require more frequent touch-ups or resealing in a kitchen environment. Additionally, it’s crucial to follow proper application and sealing techniques to ensure the durability of the finish.
Ultimately, if you’re looking to achieve a matte, distressed, or vintage look for your kitchen cabinets, chalk paint can be an excellent choice, provided you’re willing to put in the effort to properly seal and maintain the finish.
10. What are some creative ways to make kitchen cabinets look like custom-built?
If you want your kitchen cabinets to have the appearance of custom-built cabinetry without the hefty price tag, there are several creative strategies you can employ:
- Crown Molding: Install crown molding at the top of your cabinets to give them a custom and upscale look. This simple addition can make a significant difference.
- Extended Height: Extend the height of your upper cabinets to reach the ceiling. This not only adds storage space but also creates a built-in and custom appearance.
- Glass Cabinet Doors: Incorporate glass cabinet doors with mullion details. This showcases your dishes and adds an elegant touch.
- Custom Door Panels: Consider adding custom door panels or inserts, such as beadboard, decorative metal, or textured glass, to give your cabinets a unique and high-end appearance.
- Open Shelving: Combine open shelving with closed cabinets. This not only adds a custom element but also allows you to display decorative items.
- Custom Hardware: Invest in high-quality, unique, and stylish cabinet hardware. The right knobs and pulls can elevate the overall look.
- Muted Color Palette: Choose a muted or neutral color palette for your cabinets. Subtle colors often convey a more custom and timeless feel.
- Custom Toe Kicks: Replace standard toe kicks with custom-designed ones that match the style of your cabinets. This small detail can make a big impact.
- Built-In Appliances: Consider built-in or panel-ready appliances that blend seamlessly with your cabinetry. This creates a cohesive and custom look.
- Furniture-Style Cabinets: Incorporate furniture-style cabinets, such as a kitchen island with decorative legs or a hutch-like cabinet, for a custom and unique appearance.
- Custom Cabinetry Inserts: Invest in custom cabinet inserts like pull-out spice racks, utensil organizers, or tray dividers to maximize storage and functionality.
- Unique Countertops: Choose a distinctive countertop material, like marble, quartzite, or concrete, to add a luxurious and custom touch.
- Decorative Panels: Add decorative panels to the sides of your cabinets or on the ends of islands to create a built-in and cohesive look.
- Custom Lighting: Install custom under-cabinet lighting or pendant lights to enhance the visual appeal of your cabinets.
By incorporating these creative strategies, you can make your kitchen cabinets look like custom-built cabinetry without the need for a full custom kitchen renovation. These design choices and elements can add personality, style, and functionality to your kitchen while staying within your budget.
Read: Achieve a Kitchen Makeover on a Small Budget
Read: Small Changes, Big Impact: Updating Your Kitchen Cabinets on a Budget
