Staining Cabinets for DIY Kitchen Cabinet Installation
In this comprehensive guide, we’ll address the most frequently asked questions about staining cabinets for DIY kitchen cabinet installation. Whether you’re a seasoned DIY enthusiast or a beginner looking to spruce up your kitchen, staining cabinets can be a rewarding and cost-effective way to transform your space. We’ll cover various aspects of the staining process, from preparation to finishing touches, to help you achieve professional-looking results.
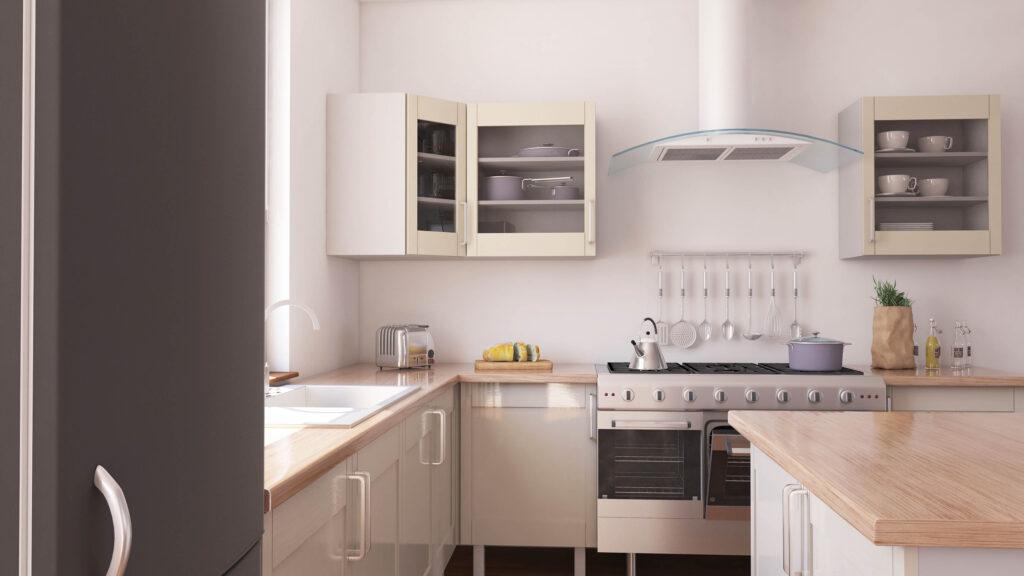
See: Kitchen Cabinets
1. How do I prepare cabinets for staining?
Before you start staining your cabinets, thorough preparation is essential for a successful project. Follow these steps:
- Remove Cabinet Hardware: Take off handles, knobs, and hinges from the cabinet doors and drawers.
- Clean Cabinets: Wipe down all surfaces with a degreaser to remove dirt, grime, and grease buildup.
- Sand the Wood: Use fine-grit sandpaper to lightly sand the cabinet surfaces, ensuring an even and smooth finish.
- Fill Imperfections: Fill any holes, cracks, or imperfections with wood filler and sand them smooth.
- Apply Wood Conditioner: To ensure even stain absorption, apply a wood conditioner according to the manufacturer’s instructions.
2. What type of stain should I use for cabinets?
Choosing the right stain is crucial for achieving the desired look and durability. There are two main types of stains:
- Oil-Based Stains: These provide a rich and deep color, making them popular for cabinets. They take longer to dry but offer excellent durability and color retention.
- Water-Based Stains: Water-based stains dry faster and have low odor. They are also more environmentally friendly. However, they may not penetrate wood as deeply as oil-based stains.
Consider your preferences and the wood type of your cabinets when selecting a stain. Test a small area first to ensure you achieve the desired color.
3. How do I apply stain to cabinets?
Applying stain correctly is essential for a beautiful finish. Follow these steps:
- Stir Thoroughly: Mix the stain well to ensure an even color.
- Apply Stain: Use a brush, rag, or foam applicator to apply the stain evenly in the direction of the wood grain.
- Wipe Excess: After a few minutes, wipe off any excess stain with a clean cloth, following the wood grain.
- Allow to Dry: Let the stain dry completely, usually for at least 24 hours.
- Inspect and Repeat: If you desire a darker color, repeat the staining process until you achieve the desired shade.
4. Can I change the cabinet stain color?
Yes, you can change the cabinet stain color if you’re not satisfied with the initial result or if you want to update your kitchen’s look. To change the stain color, you’ll need to follow a few steps:
- Strip the Old Finish: Use a paint stripper or sandpaper to remove the old stain and finish.
- Sand and Prepare: Sand the wood surfaces to smooth out any imperfections and prepare them for the new stain.
- Choose a New Stain: Select a new stain color that complements your kitchen’s aesthetic.
- Apply New Stain: Follow the staining process mentioned earlier with the new stain color.
- Finish and Seal: After the new stain has dried, apply a clear polyurethane finish for protection and durability.
5. How can I achieve a uniform stain color on all cabinets?
Consistency in stain color is crucial for a professional look. Here are some tips to achieve uniformity:
- Test on Scrap Wood: Before staining your cabinets, test the stain on a piece of scrap wood to ensure it matches your expectations.
- Work in Small Sections: Stain one cabinet at a time or a few doors and drawers together to maintain consistent drying times.
- Apply Evenly: Ensure that you apply the stain evenly and consistently, avoiding puddles or drips.
- Wipe Excess Promptly: Always wipe off excess stain promptly to prevent uneven coloration.
- Use Same Batch: If using multiple cans of stain, mix them together to ensure uniform color throughout the project.
By following these steps and paying attention to detail, you can achieve a consistent and appealing stain color across all your cabinets.
6. How long should I let the stain dry before applying a finish?
Allowing the stain to dry properly before applying a finish is crucial for a successful cabinet staining project. Here’s a general guideline:
- Oil-Based Stains: These typically require 24 to 48 hours of drying time. Check the manufacturer’s instructions for specific recommendations.
- Water-Based Stains: These dry faster, usually within 2 to 4 hours. However, it’s still advisable to wait at least 24 hours for complete drying.
Ensure that the stain is completely dry to the touch before proceeding with the finishing steps to prevent any issues with the final coat.
7. What is the best finish for stained cabinets?
The choice of finish for your stained cabinets depends on your preferences and the level of protection and sheen you desire. Common cabinet finishes include:
- Polyurethane: Provides a durable and glossy finish, making it suitable for high-traffic areas like kitchens.
- Varnish: Offers a clear and protective finish with various levels of sheen, from matte to glossy.
- Lacquer: Provides a smooth and glossy finish and dries quickly, but it may require more maintenance.
- Wax: Offers a natural and matte finish, but it’s less protective than other options.
Consider the aesthetics, durability, and maintenance requirements when choosing the best finish for your stained cabinets.
8. How do I maintain stained cabinets?
Proper maintenance is essential to preserve the beauty of your stained cabinets. Here are some maintenance tips:
- Regular Cleaning: Wipe down your cabinets regularly with a soft, damp cloth to remove dust and spills.
- Avoid Harsh Cleaners: Use gentle, non-abrasive cleaners to avoid damaging the finish.
- Handle with Care: Be gentle when opening and closing cabinet doors to prevent wear and tear.
- Inspect and Touch-Up: Periodically inspect your cabinets for any damage or wear and touch up the finish as needed.
- Avoid Excess Moisture: Prevent prolonged exposure to moisture, as it can damage the wood and finish.
By following these maintenance practices, you can keep your stained cabinets looking beautiful for years to come.
9. Can I stain laminate cabinets?
Staining laminate cabinets can be challenging because laminate surfaces are not wood. Instead of staining, consider these options:
- Painting: You can paint laminate cabinets with a primer and paint specifically designed for laminate surfaces.
- Refacing: Consider refacing the laminate cabinets with wood veneer or new laminate sheets for a fresh look.
- Vinyl Wrap: Apply a vinyl wrap that mimics the look of wood if you want a wood-like appearance.
Staining is generally not recommended for laminate cabinets due to the different composition of the surface.
10. How can I fix blotchy or uneven staining on cabinets?
Blotchy or uneven staining can be frustrating, but it’s possible to fix it. Here’s what you can do:
- Sand and Restain: Sand the unevenly stained areas lightly and reapply the stain evenly.
- Use a Pre-Stain Conditioner: Apply a pre-stain conditioner before staining to help the wood absorb the stain more evenly.
- Thin the Stain: If the stain is too thick, thin it with a compatible thinner to improve absorption.
- Practice Proper Technique: Ensure you’re applying the stain evenly and wiping off excess promptly during the staining process.
With patience and attention to detail, you can correct blotchy or uneven staining on your cabinets to achieve a more uniform finish.
In conclusion, staining cabinets for a DIY kitchen cabinet installation project can be a rewarding endeavor. By following proper preparation, staining, and finishing techniques, you can transform your kitchen’s appearance and add a touch of personal style. Remember to choose the right stain, finish, and maintenance practices to ensure your cabinets stay beautiful for years to come.
11. How can I prevent streaks and drips while staining cabinets?
Streaks and drips can mar the appearance of your stained cabinets. Here’s how to prevent them:
- Practice Proper Technique: Apply stain with long, even strokes following the wood grain to minimize streaks.
- Use Minimal Stain: Apply stain sparingly to avoid excess that can lead to drips.
- Wipe Excess Promptly: Always wipe off excess stain with a clean cloth to prevent drips and streaks from forming.
By taking your time and being mindful of your staining technique, you can achieve a smooth and streak-free finish on your cabinets.
12. Should I remove cabinet doors and drawers for staining?
Removing cabinet doors and drawers before staining is generally recommended for several reasons:
- Easier Access: Removing these components makes it easier to access all surfaces of the cabinets.
- Even Application: It allows for more even stain application and ensures the edges and corners are properly covered.
- Faster Drying: Doors and drawers can be stained separately, speeding up the drying process.
Label each door and drawer for reassembly, and be sure to store the hardware and screws in a safe place during the staining process.
13. Can I stain over existing stained cabinets?
Staining over existing stain is possible but comes with challenges:
- Stripping: You may need to strip the existing stain and finish to ensure proper adhesion of the new stain.
- Compatibility: Ensure that the new stain is compatible with the old stain to avoid undesirable results.
- Test First: Test a small, inconspicuous area before staining the entire cabinet to gauge compatibility and appearance.
In most cases, it’s recommended to strip the old stain for the best results when restaining cabinets.
14. What’s the best way to add depth and dimension to stained cabinets?
To enhance the visual appeal of your stained cabinets and add depth and dimension, consider these techniques:
- Gel Stains: Gel stains tend to sit on the surface, providing an opportunity to layer and create depth. Apply multiple coats with different shades for a dimensional look.
- Glaze: Glazing is another method to add depth. After staining, apply a glaze and wipe it off, leaving the glaze in crevices and corners.
- Distressing: Create a weathered look by distressing the cabinets with sandpaper or other tools, then applying stain to the distressed areas for contrast.
Experiment with these techniques to achieve the desired depth and dimension in your stained cabinets.
15. How do I protect surrounding surfaces when staining cabinets?
Protecting surrounding surfaces is crucial to prevent accidental staining. Here’s how to safeguard your kitchen during the cabinet staining process:
- Cover Countertops: Use drop cloths or plastic sheeting to cover countertops and any adjacent surfaces.
- Mask Off Walls: Use painter’s tape and plastic sheeting to mask off walls, appliances, and other areas you want to keep stain-free.
- Floor Protection: Lay drop cloths or plastic sheeting on the floor to catch any drips or spills.
Taking these precautions will help ensure that only your cabinets receive the stain, keeping your kitchen clean and stain-free.
16. Can I stain cabinets without sanding?
While sanding is typically recommended for optimal stain adhesion and a smooth finish, there are products like “liquid sandpaper” or “deglossers” that claim to allow staining without sanding. However, their effectiveness can vary, and they may not provide the same results as traditional sanding.
If you choose to skip sanding, ensure that your cabinets are clean and free of any dirt, grease, or old finish. Additionally, test the stain in a small inconspicuous area to ensure it adheres properly before proceeding with the entire project.
17. How do I choose the right color for staining my cabinets?
Choosing the right stain color is a critical decision for your kitchen’s aesthetics. Consider the following factors:
- Kitchen Style: The overall style of your kitchen, whether it’s traditional, modern, or rustic, should influence your stain color choice.
- Wood Type: Different woods take stains differently. Test the stain on a small section of your cabinets to see how it looks on your specific wood.
- Lighting: Consider the kitchen’s lighting. Dark stains can make a room feel cozier, while lighter stains can make it appear more spacious.
- Personal Preference: Ultimately, choose a stain color that resonates with your personal style and preferences.
It’s a good idea to obtain stain samples or purchase a small can of stain to test on your cabinets before committing to a larger project.
18. Can I stain painted cabinets?
Staining over painted cabinets can be challenging due to the presence of paint and potential adhesion issues. It’s typically recommended to strip the paint before staining. Here’s what you can do:
- Strip the Paint: Use a paint stripper or sandpaper to remove the paint completely.
- Prepare the Surface: Sand the wood surface to ensure it’s smooth and free of imperfections.
- Stain Application: Proceed with staining as you would on bare wood.
Keep in mind that the final appearance will depend on the type of wood underneath the paint and the stain you choose.
19. How can I prevent brush marks when applying stain?
To prevent brush marks when applying stain, follow these tips:
- Use Quality Brushes: Invest in high-quality brushes designed for staining to minimize brush marks.
- Work Quickly: Stain a small section at a time and work quickly to blend brush strokes.
- Apply Evenly: Apply the stain evenly with long, smooth strokes in the direction of the wood grain.
- Feather the Edges: Feather the edges of each section to blend brush marks and create a seamless finish.
By using the right tools and techniques, you can achieve a smooth and brush mark-free appearance on your cabinets.
20. How long does stained cabinetry last?
The lifespan of stained cabinetry depends on several factors:
- Quality of Materials: High-quality wood and finishes can last longer.
- Maintenance: Proper care and maintenance can extend the lifespan of stained cabinets.
- Usage: Cabinets in high-traffic areas may wear faster than those in less-used spaces.
With proper care and maintenance, stained cabinets can last for several decades, making them a durable and stylish choice for your kitchen.
In this extended guide, we’ve covered a wide range of questions and topics related to staining cabinets for a DIY kitchen cabinet installation project. Armed with this knowledge, you can confidently tackle your cabinet staining project and transform your kitchen into a space you’ll love for years to come. Remember to plan carefully, follow best practices, and enjoy the process of enhancing your kitchen’s beauty and functionality.
Read: Painting Cabinets for DIY Kitchen Cabinet Installation
