Finishing Touches for DIY Kitchen Cabinet Installation
So, you’ve successfully completed the installation of your kitchen cabinets, and now it’s time to add those finishing touches to make your project truly shine. Whether you’re a seasoned DIY enthusiast or a first-time cabinet installer, adding these final details can make a significant difference in the overall appearance and functionality of your kitchen. In this article, we’ll address ten of the most common questions people have about finishing touches for DIY kitchen cabinet installation.
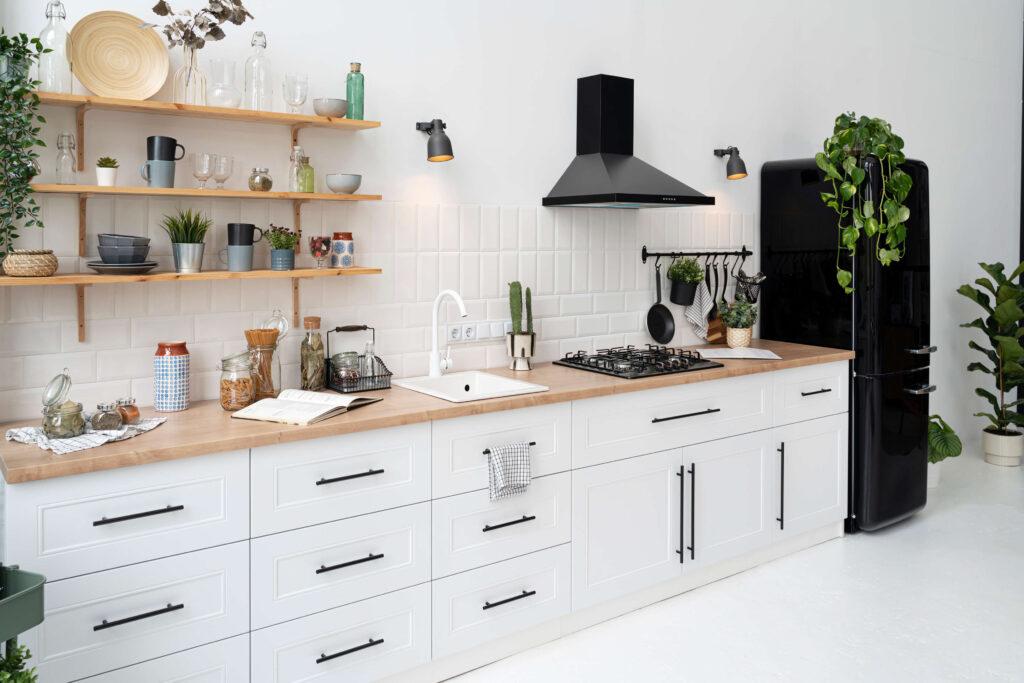
1. How Do I Choose Cabinet Hardware?
When it comes to cabinet hardware, the choices can be overwhelming. Here are some key factors to consider:
Style:
- Choose hardware that complements the overall style of your kitchen. For a modern kitchen, sleek and minimalist hardware works well, while traditional kitchens benefit from more ornate options.
Finish:
- Consider the finish of your cabinet hardware. Options include brushed nickel, chrome, oil-rubbed bronze, and more. Make sure it coordinates with your kitchen’s color scheme and other fixtures.
Functionality:
- Think about how you use your cabinets. Knobs are easier to grasp, while pulls provide more surface area for your fingers. Experiment with both to see which feels more comfortable.
Size and Proportion:
- Ensure that the size and proportion of the hardware fit the cabinet doors and drawers. Oversized hardware on small cabinets can look out of place.
Installation:
- Check if the hardware you choose requires additional drilling or holes in your cabinets. Make sure you have the tools and skills necessary for the installation.
Budget:
- Hardware costs can vary significantly. Set a budget and stick to it to avoid overspending on this finishing touch.
In summary, selecting the right cabinet hardware involves considering the style, finish, functionality, size, proportion, installation requirements, and your budget.
2. What’s the Best Way to Add Under-Cabinet Lighting?
Under-cabinet lighting is a fantastic way to add both functionality and ambiance to your kitchen. Here’s how to go about it:
Types of Under-Cabinet Lighting:
- Choose between three main types: puck lights, linear strips, and tape lights. Puck lights are discreet but may create shadows. Linear strips provide even illumination. Tape lights are flexible and easy to install.
Power Source:
- Decide whether you want hardwired or plug-in lighting. Hardwired options require professional installation, while plug-in lights are more DIY-friendly.
Location:
- Determine where you want to install the lights. They are typically mounted at the front or back of the cabinet’s underside. Consider the placement for optimal task lighting.
Installation:
- Follow the manufacturer’s instructions for installation carefully. Make sure to hide wires and connections for a clean look.
Bulb Type:
- Choose LED bulbs for their energy efficiency and longevity. They produce minimal heat, which is essential when lighting cabinets.
Dimmers:
- Consider installing dimmer switches for adjustable lighting levels. This allows you to create different moods in your kitchen.
Under-cabinet lighting can dramatically enhance the aesthetics of your kitchen while providing practical illumination for tasks. Careful planning and installation are key to achieving the best results.
Stay tuned for the following sections, where we’ll address more questions on adding finishing touches to your DIY kitchen cabinet installation project.
3. How Can I Conceal the Gaps Between Cabinets and the Wall?
Achieving a seamless look between your cabinets and the wall is crucial for a polished kitchen. Here’s how to address those gaps:
Scribe Molding:
- Scribe molding is a thin strip of wood that can be customized to fit irregularities in your wall. Install it between the cabinet and the wall, ensuring a snug fit.
Caulking:
- Use paintable caulking to fill any small gaps between the cabinet and the wall. This creates a seamless transition and prevents dust and debris from accumulating in the crevices.
Trim:
- Depending on your kitchen’s style, you can add decorative trim to cover gaps. Crown molding or quarter-round molding can be excellent choices.
Shims:
- If there are uneven gaps between the cabinets and the wall, you can use shims to level the cabinets. Once they are level, proceed with scribe molding, caulking, or trim to finish the look.
Paint or Stain:
- After applying any of the above solutions, paint or stain the molding, trim, or cabinets to match the rest of your kitchen for a cohesive appearance.
Achieving a tight and clean fit between your cabinets and the wall is essential for both aesthetics and functionality.
4. What’s the Best Way to Install Cabinet Crown Molding?
Cabinet crown molding adds an elegant and finished look to your kitchen. Here’s a step-by-step guide on how to install it:
Tools and Materials:
- Gather the necessary tools and materials, including crown molding, a saw, nails or screws, a level, a measuring tape, a pencil, and a miter saw.
Measure and Cut:
- Measure the length of each cabinet run where you plan to install crown molding. Cut the molding at a 45-degree angle using a miter saw.
Attach the Molding:
- Attach the molding to the top of the cabinets using nails or screws. Make sure it is level and aligned correctly.
Fill and Sand:
- Fill any nail or screw holes with wood filler and sand the molding smooth for a seamless finish.
Paint or Stain:
- Paint or stain the molding to match your cabinets. Ensure it complements the overall kitchen design.
Corners:
- Installing crown molding in corners can be challenging. Use corner blocks or cope the molding for a professional look.
Touch-Up:
- Inspect the installation for any imperfections and touch up the paint or stain as needed.
Properly installed crown molding can transform the appearance of your kitchen cabinets, adding an upscale and finished touch.
Keep reading for more tips on perfecting your DIY kitchen cabinet installation.
5. How Do I Choose Cabinet Paint or Stain Colors?
Selecting the right paint or stain color for your kitchen cabinets is a crucial decision. Here’s how to make the best choice:
Consider Your Kitchen’s Style:
- The cabinet color should harmonize with your kitchen’s overall style. For a modern look, consider crisp whites, grays, or bold colors. Traditional kitchens often feature warm wood tones or classic whites.
Lighting:
- Take into account the amount and type of lighting in your kitchen. Natural light can influence how colors appear. Test samples in your kitchen to see how they look under different lighting conditions.
Cabinet Material:
- The material of your cabinets plays a role in color selection. Some woods have natural colors or grains that you may want to highlight with a stain. Paint can completely change the look of cabinets.
Complementing Colors:
- Consider the colors of your countertops, backsplash, and flooring. Your cabinet color should complement these elements for a cohesive design.
Samples:
- Always test paint or stain samples on a small section of your cabinets to see how they look in your specific kitchen.
Trends vs. Timelessness:
- Think about whether you prefer a trendy or timeless look. Trends may be appealing now, but they can quickly become dated.
Maintenance:
- Keep in mind that lighter colors may show less dirt and wear, while darker colors can hide imperfections but may require more maintenance.
Choosing the right cabinet paint or stain color is a personal decision that should align with your style and preferences while considering practicality and long-term satisfaction.
6. How Can I Add Glass Inserts to My Cabinet Doors?
Adding glass inserts to cabinet doors can lend an elegant and airy feel to your kitchen. Here’s how to do it:
Gather Materials:
- You’ll need cabinet doors with removable panels, glass inserts, a router, glass retainer strips, glazing compound, and hardware.
Remove Panels:
- Take off the cabinet door panels by unscrewing them or carefully prying them out.
Measure and Cut Glass:
- Measure the openings and have glass inserts cut to fit. Ensure the edges are smooth and safe.
Router Groove:
- Use a router to create a groove around the inside edge of the door frame to hold the glass. Be precise in your measurements and work carefully.
Install Glass:
- Place the glass inserts into the grooves you’ve created. Use glazing compound to secure them in place.
Add Retainer Strips:
- Attach glass retainer strips on top of the glass, securing them with screws. These strips hold the glass in place and provide a finished look.
Hardware:
- Reattach the cabinet door hardware. Glass inserts can be heavier, so ensure your hardware is sturdy.
Finishing Touch:
- Sand and finish the cabinet doors as desired. Paint or stain them to match your kitchen’s aesthetic.
Glass inserts can give your kitchen a sophisticated and open appearance while allowing you to showcase decorative items or beautiful dishware.
Stay tuned for more valuable information on perfecting your DIY kitchen cabinet installation project.
7. How Do I Install Cabinet Drawer Inserts?
Drawer inserts are essential for organizing your kitchen and maximizing storage space. Here’s how to install them:
Choose Inserts:
- Decide on the type of inserts you need, such as dividers, utensil trays, or spice organizers. Measure your drawers to ensure a proper fit.
Remove Drawers:
- Empty the drawers and remove them from the cabinet. This makes it easier to work on them.
Install Inserts:
- Place the inserts in the drawers according to your chosen configuration. Many inserts come with adjustable dividers for customization.
Secure Inserts:
- Some inserts may require screws or clips to secure them in place. Follow the manufacturer’s instructions for installation.
Reassemble:
- Once the inserts are in place and secure, reassemble the drawers and return them to their proper locations in the cabinet.
Test and Organize:
- Test the functionality of your inserts by organizing your kitchen items. Adjust dividers as needed to accommodate your specific needs.
Drawer inserts are a practical addition to your kitchen cabinets, helping you keep utensils, cutlery, and other items neatly organized.
Stay tuned for more insights on completing your DIY kitchen cabinet installation.
8. What Are Some Creative Ways to Enhance Cabinet Doors?
Enhancing cabinet doors can be a fun and creative way to personalize your kitchen. Here are some ideas:
Decorative Panels:
- Add beadboard or other decorative panels to cabinet doors for a cottage or farmhouse look.
Glass Inserts:
- As previously mentioned, glass inserts can provide a touch of elegance and display your favorite dishes.
Chalkboard or Whiteboard:
- Apply chalkboard or whiteboard paint to the center panel of cabinet doors for grocery lists, recipes, or notes.
Wallpaper:
- Use removable wallpaper to cover the center panel for a pop of color or pattern.
Beveled Edges:
- Add beveled edges or decorative molding to the cabinet door frames for a custom appearance.
Unique Hardware:
- Swap out standard knobs and pulls for unique and eye-catching hardware to make a statement.
Open Shelving:
- Convert some cabinet doors into open shelving by removing the center panel. This can create a trendy and functional display space.
Enhancing cabinet doors can breathe new life into your kitchen and reflect your personal style.
Keep reading for more tips on adding those finishing touches to your DIY kitchen cabinet installation.
9. What’s the Best Way to Maintain and Clean Cabinet Surfaces?
Maintaining and cleaning your cabinet surfaces is essential to preserve their appearance and longevity. Here’s how to do it effectively:
Regular Dusting:
- Dust cabinet surfaces regularly with a soft, lint-free cloth or microfiber duster to prevent the buildup of dust and debris.
Gentle Cleaning Solution:
- For routine cleaning, mix a mild dish soap with warm water. Use a soft cloth or sponge to wipe down cabinet surfaces. Avoid abrasive cleaners that can damage the finish.
Stain Removal:
- If you encounter stains or spots, gently rub with a mixture of baking soda and water. Rinse thoroughly and dry.
Avoid Excess Moisture:
- Be cautious about excessive moisture, especially near sinks and dishwashers. Water can damage cabinet finishes and cause warping.
Grease and Grime:
- For kitchen cabinets, grease and grime may accumulate over time. Use a mixture of vinegar and water or a commercial degreaser to clean stubborn areas.
Polishing:
- Periodically, apply a furniture polish or cabinet-specific cleaner to maintain the cabinet’s luster and protect the finish.
By following these maintenance and cleaning tips, you can keep your kitchen cabinets looking their best for years to come.
10. What Are Some Space-Saving Ideas for Inside Cabinets?
Maximizing the space inside your cabinets is crucial for an organized and efficient kitchen. Here are some space-saving ideas:
Pull-Out Shelves:
- Install pull-out shelves in lower cabinets to make items in the back more accessible.
Lazy Susans:
- Lazy Susans can efficiently store items in corner cabinets, making use of otherwise awkward spaces.
Door Organizers:
- Utilize the inside of cabinet doors for small items, such as spice racks or cutting board holders.
Drawer Dividers:
- Use drawer dividers to keep utensils, cutlery, and kitchen tools neatly organized.
Pot Racks:
- Hang pots and pans from the ceiling or on a wall-mounted rack to free up cabinet space.
Vertical Dividers:
- Install vertical dividers or tray organizers in deep drawers to store baking sheets, trays, and cutting boards vertically.
Pull-Out Trash and Recycling Bins:
- Incorporate pull-out bins in your cabinets to keep trash and recycling concealed.
By implementing these space-saving solutions, you can make the most of your cabinet storage and keep your kitchen organized and efficient.
In conclusion, finishing touches are the icing on the cake when it comes to DIY kitchen cabinet installation. From hardware selection to maintenance and space-saving ideas, these details can transform your kitchen into a functional and aesthetically pleasing space.
Read: Hanging Doors and Drawers for DIY Kitchen Cabinet Installation
Read: Painting Cabinets for DIY Kitchen Cabinet Installation
