Enhancing the Look and Feel of Wood Cabinetry: A Comprehensive Guide
How to Choose the Right Finish for Your Wood Cabinetry
When it comes to enhancing the look and feel of your wood cabinetry, choosing the right finish is crucial. The finish not only adds aesthetic appeal but also protects the wood from moisture, stains, and daily wear. Here are some key factors to consider when selecting the right finish for your wood cabinetry:
- Wood Type: Different wood types have varying natural colors and grains. The finish you choose should complement and enhance these natural features. For example, a clear finish might work well for showcasing the beauty of oak, while a darker stain could enhance the richness of cherry wood.
- Style and Ambiance: Consider the overall style you want to achieve in your space. A high-gloss finish can give a modern and sleek appearance, while a matte finish imparts a more rustic or traditional vibe. The ambiance you desire will guide your finish choice.
- Durability: Cabinetry is subjected to constant use, so durability is important. A polyurethane or lacquer finish offers excellent protection, whereas an oil finish might require more frequent maintenance.
- Maintenance: Different finishes have different maintenance requirements. Some may need periodic reapplication, while others may only require routine cleaning. Be sure to choose a finish that aligns with your maintenance preferences.
- Lighting: Consider the lighting in your space. Certain finishes can reflect light and make the room appear brighter, while others might absorb light and create a cozier atmosphere. Test samples in your space to see how they interact with your lighting.
- Sample Testing: Always test your chosen finish on a small, inconspicuous area of your cabinetry before applying it to the entire surface. This will help you ensure that the finish looks as expected on your specific wood type.
- Environmental Impact: Some finishes contain volatile organic compounds (VOCs) that can emit harmful fumes. If you’re concerned about indoor air quality, opt for low-VOC or VOC-free finishes.
- Application Method: Finishes can be brushed, sprayed, or wiped on. The application method can affect the final look and durability of the finish. Research and choose the method that suits your skill level and desired outcome.
- Color Options: If you’re interested in altering the color of your wood cabinetry, consider stains or tinted finishes. These can add depth and dimension to the wood while still allowing its natural beauty to shine through.
- Budget: Finishes come in a range of price points. Factor in the cost of the finish, as well as any additional tools or materials required for application.
Remember, the right finish can truly transform the appearance of your wood cabinetry. Take your time, do your research, and choose a finish that aligns with your aesthetic preferences and practical needs.
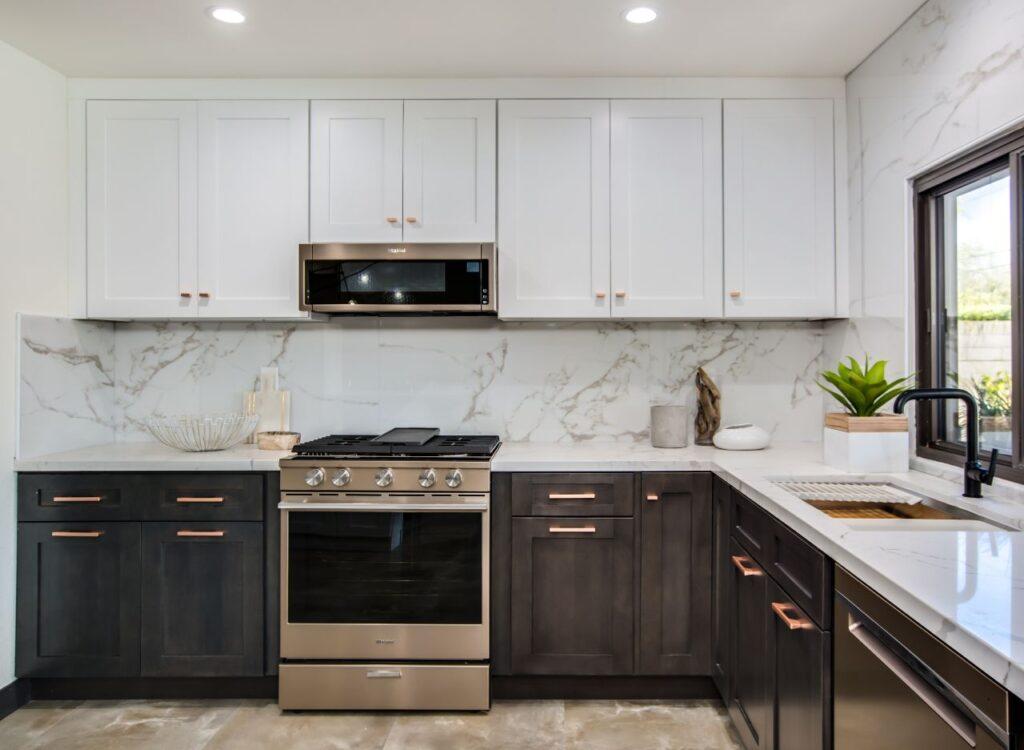
Enhancing Wood Cabinetry with Hardware and Accessories
The hardware and accessories you choose for your wood cabinetry can significantly enhance its look and functionality. These seemingly small details can make a big impact on the overall aesthetic of your space. Here’s how to make the most of hardware and accessories:
- Knobs vs. Pulls: Decide whether you prefer knobs or pulls for your cabinetry. Knobs offer a classic and versatile option, while pulls can provide a more contemporary and substantial look. Mix and match for a unique style.
- Material and Finish: Consider the material and finish of your hardware. Match it to other fixtures in the room, such as faucets and lighting. Popular options include brushed nickel, bronze, chrome, and brass.
- Consistency: For a cohesive look, choose hardware that’s consistent in style and finish throughout the space. This doesn’t mean everything needs to match exactly, but there should be a unifying element.
- Cabinet Hinges: Hinges are often overlooked, but they can be visible when the cabinets are open. Choose hinges that complement your hardware and cabinetry style.
- Drawer Organizers: Enhance the functionality of your cabinetry with drawer organizers. They keep your drawers tidy and make it easy to find items. Options range from simple dividers to custom inserts.
- Pull-Out Shelving: Consider incorporating pull-out shelves or baskets into your cabinetry. These make accessing items at the back of deep cabinets much easier and more convenient.
- Under-Cabinet Lighting: While not strictly hardware, under-cabinet lighting can dramatically enhance the ambiance and functionality of your cabinetry. LED strips or puck lights are popular choices.
- Glass Inserts: If you have glass-fronted cabinets, consider decorative glass inserts. These can add elegance and visual interest to your cabinetry.
- Open Shelving: Open shelving is a trend that allows you to display items openly. Consider integrating a few open shelves into your cabinetry design for a unique and personalized touch.
- Customization: Don’t hesitate to get creative and customize your hardware and accessories. You can find unique pulls, vintage knobs, and handcrafted pieces that add character to your cabinetry.
Remember, hardware and accessories should not only look good but also serve your needs. Prioritize functionality and choose items that make using your cabinetry a breeze while enhancing the overall aesthetic of the space.
The Art of Staining Wood Cabinetry
Staining wood cabinetry is an excellent way to add color, depth, and protection to the wood. Whether you’re looking to darken the wood for a more dramatic effect or add a touch of color, staining can transform your cabinetry. Here’s a step-by-step guide:
- Preparation: Start by removing all hardware and thoroughly cleaning the cabinetry surfaces. Sand the wood lightly to ensure the stain adheres properly.
- Choosing the Stain: There are two main types of stains: oil-based and water-based. Oil-based stains offer richer colors and longer working times, while water-based stains dry faster and have fewer fumes. Choose the type that suits your preferences.
- Color Selection: Stains come in various colors, from light to dark. Test the stain on a small, inconspicuous area to see how it interacts with your wood and achieves the desired color.
- Application: Apply the stain using a brush, cloth, or sponge, following the grain of the wood. Wipe off any excess stain after a few minutes. For a darker color, apply multiple coats, allowing each coat to dry completely.
- Drying Time: Stain drying times vary depending on the type and conditions. Follow the manufacturer’s recommendations for drying times between coats.
- Sealing the Stain: Once the stain is dry, apply a clear topcoat to protect the wood and enhance the color. Polyurethane or lacquer are common options. Apply multiple coats, sanding lightly between coats for a smooth finish.
- Finishing Touches: After the final coat of topcoat has dried, reinstall the hardware and accessories. Clean up any dust or debris, and your stained cabinetry is ready to shine.
- Maintenance: Regularly clean your stained cabinetry with a soft, damp cloth. Avoid abrasive cleaners that could damage the finish.
- Tips and Tricks: If you’re new to staining, practice on a scrap piece of wood before tackling your cabinetry. Always work in a well-ventilated area, and wear appropriate safety gear.
- Professional Help: If you’re unsure about the staining process, consider hiring a professional to ensure a flawless finish.
Staining your wood cabinetry can revitalize the entire space. It’s a skill worth mastering if you’re interested in customizing the look of your cabinetry and giving it a fresh, personalized appearance.
Maximizing Storage in Wood Cabinetry
Efficient storage is essential in any kitchen or living space, and wood cabinetry can be optimized to make the most of the available room. Whether you’re dealing with a small kitchen or a spacious pantry, here are some strategies to maximize storage in your wood cabinetry:
- Pull-Out Drawers: Install pull-out drawers in lower cabinets. These allow easy access to items at the back of the cabinet without having to reach or rummage through.
- Lazy Susans: Lazy Susans are circular rotating shelves that make use of corner cabinet space. They’re great for storing pots, pans, and other items that are typically hard to reach.
- Vertical Dividers: Incorporate vertical dividers in deep cabinets to store baking sheets, cutting boards, and trays upright. This saves space and keeps items organized.
- Door Storage: Attach racks or hooks to the inside of cabinet doors to store items like pot lids, cleaning supplies, or spices.
- Adjustable Shelving: Opt for cabinets with adjustable shelves. This allows you to customize the height of each shelf based on the items you need to store.
- Pull-Out Trash and Recycling Bins: Integrate pull-out bins for trash and recycling into your cabinetry. This keeps unsightly bins out of sight and frees up floor space.
- Drawer Organizers: Use drawer organizers to keep utensils, cutlery, and small kitchen tools neatly separated and easily accessible.
- Open Shelving: Consider a combination of closed cabinetry and open shelving. Open shelves can be used to display items you use frequently or to add a decorative touch.
- Plate Racks: Plate racks are perfect for displaying your favorite dishes while also saving cabinet space.
- Pantry Pull-Outs: If you have a pantry, install pull-out shelves or baskets to keep pantry items organized and easily visible.
By implementing these storage solutions, you can make the most of your wood cabinetry while keeping your space organized and clutter-free.
Refinishing vs. Replacing Wood Cabinetry
When your wood cabinetry starts to show signs of wear or no longer fits your style, you have the option to refinish or replace it. Both choices have their pros and cons, so here’s a comparison to help you decide:
- Cost: Refinishing is generally more cost-effective than replacing cabinetry. Replacing cabinetry involves purchasing new units and may also require professional installation.
- Time: Refinishing takes less time than completely replacing cabinetry. It involves sanding, staining or painting, and applying a new finish, whereas replacement requires demolition, ordering new cabinets, and installation.
- Aesthetics: Refinishing allows you to update the look of your existing cabinetry with new colors or finishes. Replacement provides a fresh start and the opportunity to choose entirely new designs.
- Structural Changes: If you’re unhappy with the layout of your current cabinets, replacement may be the better option, as it allows for structural modifications.
- Environmental Impact: Refinishing generates less waste and is a more sustainable choice compared to replacing and disposing of old cabinetry.
- Functionality: If your current cabinetry layout works well and you’re satisfied with the storage solutions, refinishing can maintain the functionality while giving it a facelift.
- Return on Investment: While both options can increase the value of your home, replacement may offer a higher return on investment if you’re planning to sell in the near future.
- Customization: If you want to customize your cabinetry to specific dimensions or features, replacement provides more flexibility in design.
- Budget: Consider your budget and how much you’re willing to invest in the project. Refinishing is generally more budget-friendly, but replacement might be worth it if your budget allows.
- Personal Preference: Ultimately, the decision comes down to your personal preferences, priorities, and the condition of your current cabinetry.
Assess your needs, budget, and goals to determine whether refinishing or replacing your wood cabinetry is the right choice for you.
Choosing the Right Wood Species for Cabinetry
The choice of wood species for your cabinetry affects both the aesthetics and durability of the finished product. Different wood types have distinct grains, colors, and characteristics. Here’s how to choose the right wood species for your cabinetry:
- Oak: Known for its prominent grain and durability, oak is a classic choice. It’s available in red and white varieties, with red oak having a more pronounced grain pattern.
- Maple: Maple is a hard and durable wood with a fine, even grain. It’s a popular choice for contemporary and modern cabinetry.
- Cherry: Cherry wood develops a rich, reddish-brown patina over time. It has a smooth grain and is often chosen for its elegant and timeless appearance.
- Walnut: Walnut offers a dark and luxurious look with a straight grain. It’s a bit softer than some other hardwoods, so it’s important to consider its susceptibility to dents and scratches.
- Hickory: Hickory boasts a rustic and natural appearance with varied colors and a pronounced grain. It’s a strong and durable wood, making it suitable for high-traffic areas.
- Birch: Birch has a smooth and even grain with a light color. It’s a budget-friendly option that can be stained to resemble other wood species.
- Pine: Pine has a distinct grain pattern and knots that add character. It’s often chosen for its rustic charm, but keep in mind that it’s softer and more susceptible to dents.
- Ash: Ash wood has a light color and a pronounced grain pattern. It’s a durable option that takes stains well.
- Mahogany: Mahogany offers a luxurious appearance with its deep red-brown color and straight grain. It’s often chosen for high-end cabinetry projects.
- Cabinet Design: Consider the design and style of your cabinetry. Some wood species may be better suited for certain design aesthetics.
When choosing a wood species, think about both the visual impact and the practical aspects. Consider factors such as durability, maintenance, and how well the wood complements the overall design of your space.
See: Forevermark Kitchen Cabinets
DIY Tips for Refurbishing Wood Cabinetry
Refurbishing wood cabinetry can breathe new life into your space without breaking the bank. If you’re considering a DIY project, here are some tips to ensure successful results:
- Assessment: Evaluate the condition of your cabinetry. Determine whether it needs simple cosmetic updates or if there are structural issues that need addressing.
- Cleaning: Thoroughly clean the cabinetry surfaces to remove grease, dirt, and grime. A mixture of warm water and mild detergent works well.
- Sanding: Lightly sand the cabinetry to create a smooth surface for paint or finish to adhere to. Sand out any imperfections or rough spots.
- Painting: If you’re painting, use a high-quality primer to ensure good adhesion. Choose
Read: Expanding the Possibilities with Forevermark Cabinetry
Read: Adding Intricacy to the Kitchen with Forevermark Cabinetry
